




To record Shopify sales in QuickBooks Online, you need an ecommerce accounting integration like MyWorks.
Once set up, MyWorks can automatically map your accounts and sync sales data, including prices, processing fees, and inventory. Your ecommerce accounting books will be up to date and consistent with your store, allowing you to manage taxes and bookkeeping records more effectively.
This guide walks through the exact six-step setup, plus the best practices that keep your Shopify and QuickBooks Online data clean once it’s live.
TL;DR: Recording Shopify Sales in QuickBooks Online
- Connect: install MyWorks from the Shopify App Store, and authorize QuickBooks Online.
- Map: match Shopify products to QuickBooks Online items by name or SKU.
- Settings: choose what should sync, including orders, inventory, fees, refunds and payouts.
- Fees: record Shopify payment fees as expenses so your revenue stays accurate
- Test: run a test sync and compare Shopify against QuickBooks Online
- Monitor: after the initial setup, keep an eye on the integration for the first few weeks.
Using QuickBooks Desktop instead? The setup differs in a few spots, so please follow our guide to recording Shopify sales in QuickBooks Desktop.
6 Steps to Record Shopify Sales in QuickBooks Online
The whole process runs on a single integration: MyWorks connects your Shopify store to QuickBooks Online, then automatically syncs each sale, fee, and inventory change between them. Because QuickBooks Online is cloud-based, there’s no software to install and nothing to keep running on your computer, and your data updates as often as every five minutes on the Grow plan and above.
Step 1: Connect Shopify to QuickBooks Online with MyWorks
Search for the MyWorks QuickBooks Online app in your Shopify admin or the Shopify App Store, then click ‘Install.’ MyWorks has a separate app for QuickBooks Desktop, so make sure you’re installing the QuickBooks Online app.
Once the installation is complete, find MyWorks in the ‘Apps’ section of your Shopify store menu. Click the icon, then go to Connection and click Connect to QuickBooks Online.
QuickBooks Online will open a pop-up asking you to log in to the account you want to connect. Check that it has the permissions it needs for data access, then enter your login details and click ‘Authorize’ to finish connecting the two platforms.

Step 2: Map Your Shopify Product Data to QuickBooks Online items
As soon as you’ve authorized QuickBooks Online, you can map your products. If the term’s new to you, ‘mapping’ is when an integration tells two platforms which of their fields refer to the same physical item.
You can map your products either by manually selecting the QuickBooks products or by having MyWorks match them for you. You can also decide whether to sync products by name or by stock-keeping unit (SKU) code.
But what if you only just got QuickBooks Online and haven’t added any items yet?
Mapping works a little differently when you have no accounting data. Integrations can usually sync existing Shopify data to QuickBooks Online to create it there, rather than linking items across the two platforms.
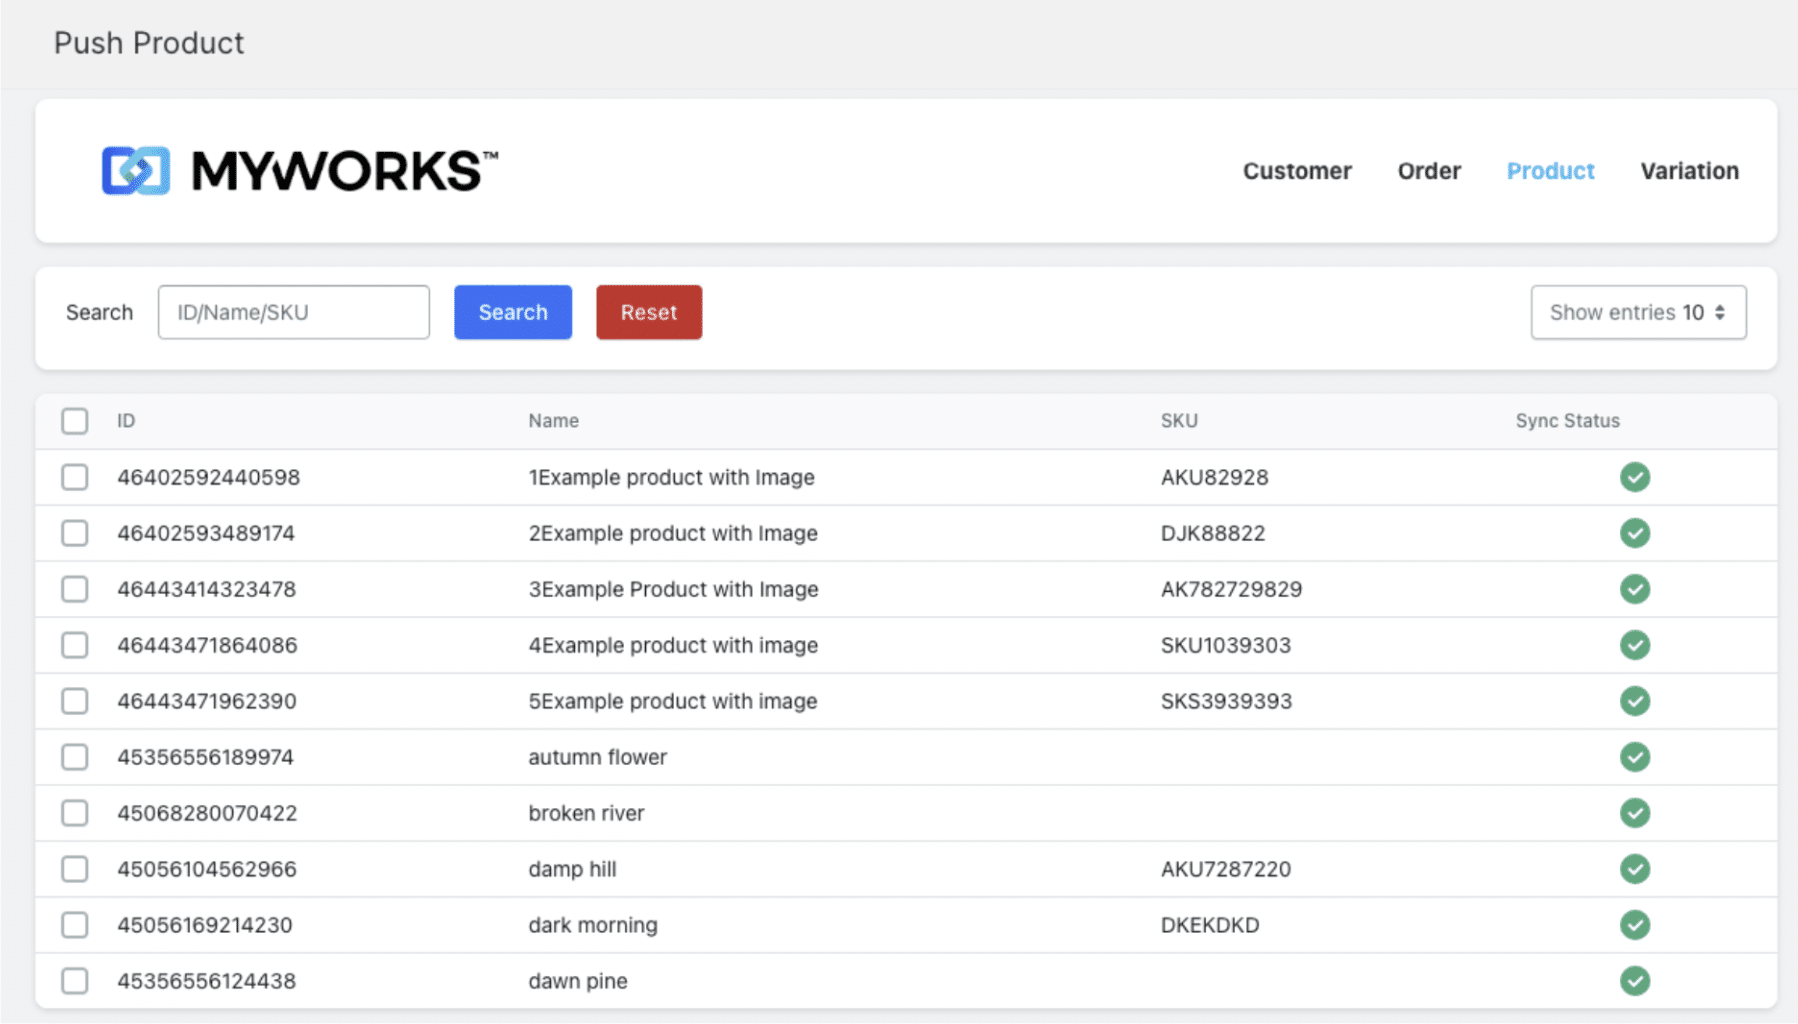
In MyWorks, there’s a separate ‘push’ function for this. Go to the ‘Push’ tab, select the data you want to sync, and everything you choose appears in QuickBooks with the same name as your Shopify account.
The result of mapping and pushing is the same: Shopify and QuickBooks understand which of their products and customers match. MyWorks also lets you choose how deeply you link the two accounts, from payment methods and customers all the way to tax rates.
Step 3: Review Your Settings
Now, your Shopify and QuickBooks accounts should mirror each other. Next, sync the ecommerce accounting data you want kept consistent across both.
Wait, didn’t I sync the platforms when I mapped them?
Syncing and mapping are similar but separate processes. While mapping creates links, syncing automatically updates the data between Shopify and QuickBooks. Taking this step means that when you make changes on one platform, they are immediately reflected on the other. For instance, if you reduce some prices on Shopify, you can log into QuickBooks and see they’re lower there, without you having to adjust the fields yourself.
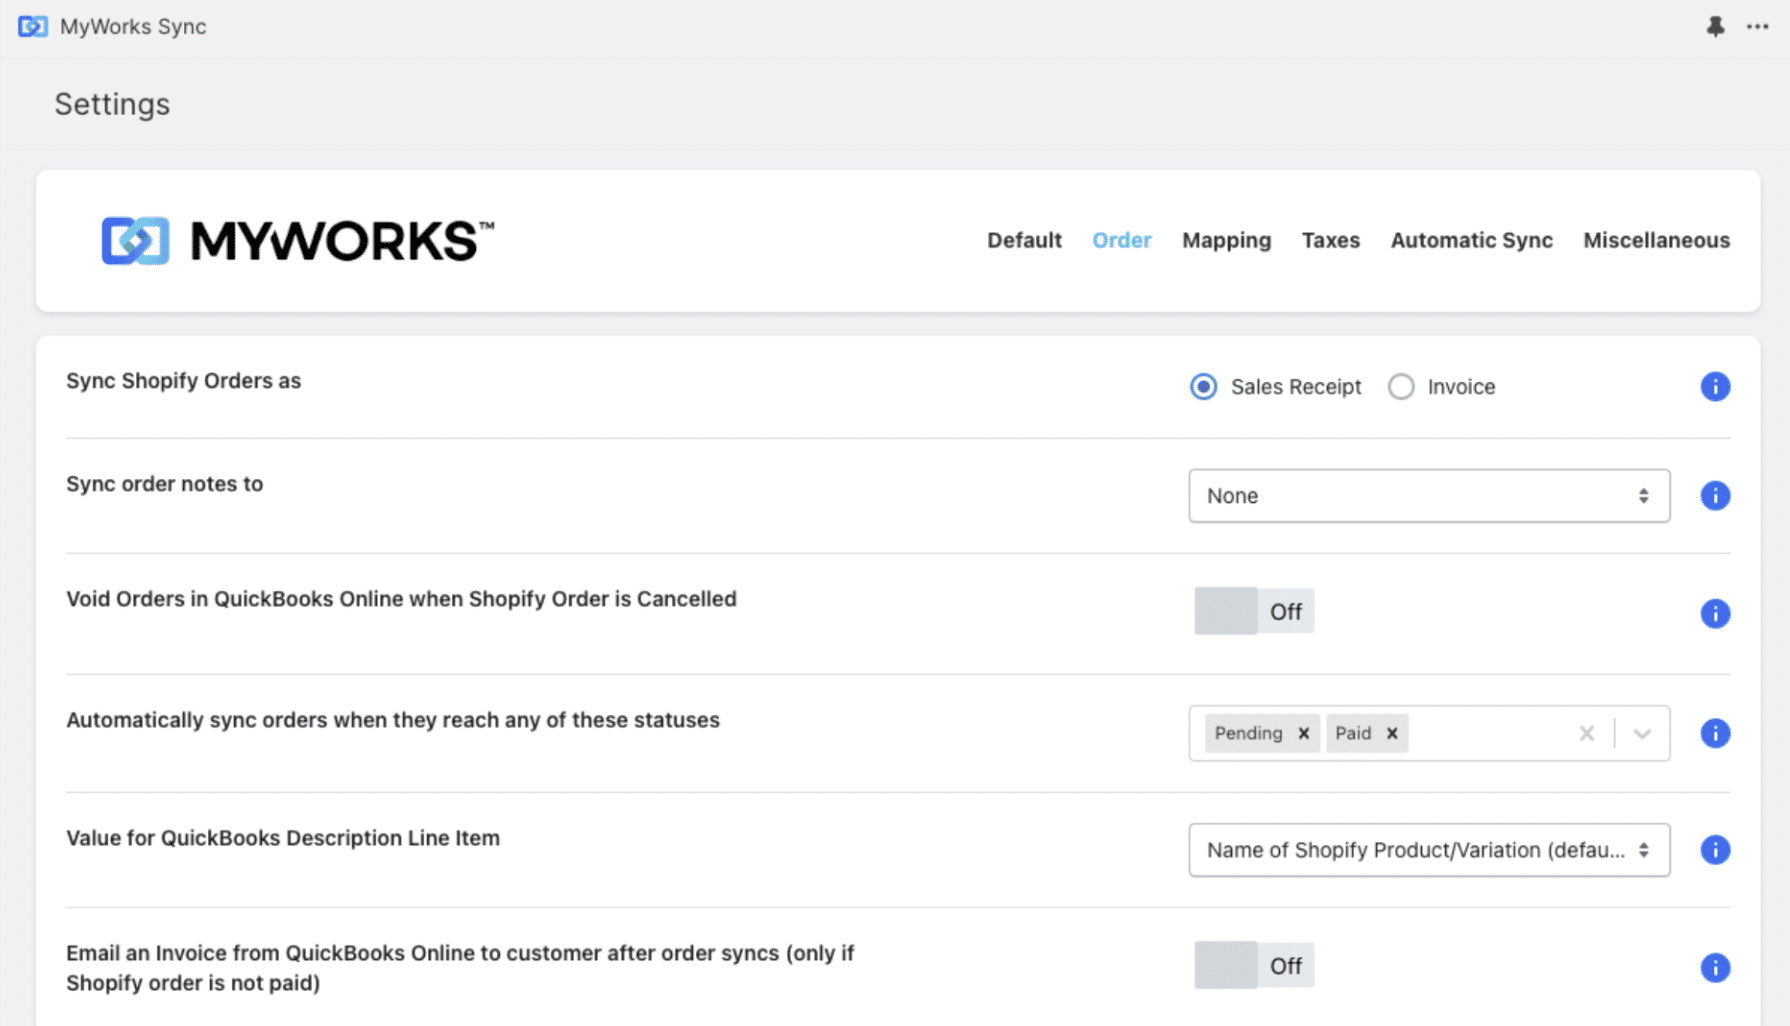
Like with mapping, MyWorks automatically syncs your new customers and orders. You have to decide which other data you’d like to reconcile. MyWorks lets you sync the following types of data under settings:
- Customer and order data.
- Products and variations.
- Inventory levels.
- Pricing and discounts.
- Refunds and exchanges.
- Transaction fees.
- Gift cards.
- Purchase orders.
This high degree of flexibility allows you to decide which information is relevant to your QuickBooks Online account. A clothes store might need to sync product variants like size and color, whereas an electronics store will be more concerned with recording brands and models.
Step 4: Set QuickBooks Online to Record Shopify Fees via MyWorks
Before you start syncing sales, set QuickBooks Online to record Shopify fees through MyWorks.
While taking this step means a little extra work, it’s worth the payoff. By documenting Shopify processing fees as they occur, you’re getting the true cost of each item upfront. These charges add up, and if you wait until later to deduct them, you could easily overestimate your revenue and profitability.
Capturing Shopify fees through MyWorks also makes expense reporting more accurate, so you can claim the deductions your business is entitled to and pay the right taxes.
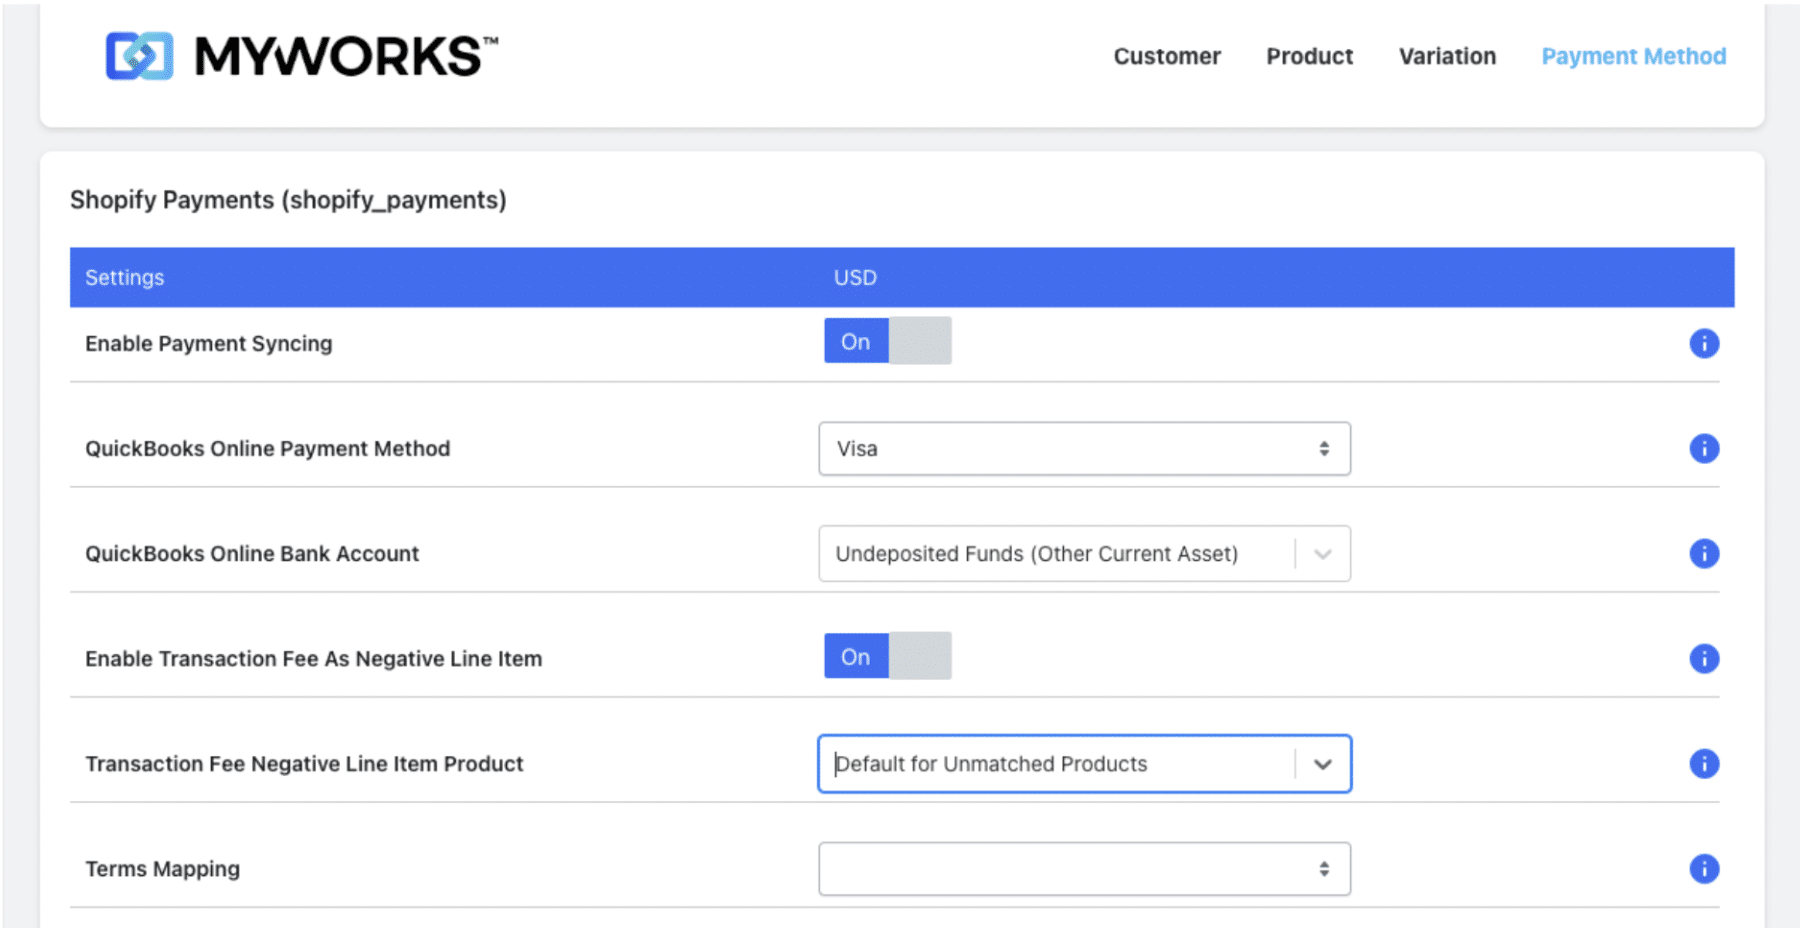
Start by checking what you pay Shopify, like subscription and transaction fees. Create an expense account for each type of charge in QuickBooks Online. Then log into MyWorks and map those expenses under the Payment Methods tab in the Map dashboard: enable the option to record fees as a negative line item, and select the correct expense type.
Step 5: Do a Test Sync
Everything on Shopify and QuickBooks Online should be ready to go. However, it’s still essential to check that your sync works as expected. You’d much rather discover issues during a quiet moment than midway through a large sale on a busy day.
Create a sample product in Shopify to verify that all the required details appear in QuickBooks Online. You may notice you haven’t synced all the relevant information, such as color and size, for accurate inventory tracking.
You can also compare QuickBooks and Shopify accounting reports to look for discrepancies. Inconsistent data suggests you haven’t synced all the items you need to.
Monitor orders over the first few weeks to check the small details like discounts and taxes. After a few sales, you’ll see whether the right information is flowing through. A small store might not need an extensive sync at this stage, so you can adjust your MyWorks settings to sync less data from then on.
Step 6: Monitor and Adjust Your Sync as Needed
Your store will change, whether that’s the products you offer or the volume you sell. That’s why it’s essential to continuously review your Shopify QuickBooks Online sync and check that it’s still meeting your needs.
One surefire way to see how your system’s performing is to collect employee feedback. If they’re struggling with any aspect of the software, they can provide a detailed report. They may even have some ideas on how to adjust your setup to solve the problem.
Scheduling regular QuickBooks reviews can also help you spot opportunities for improvement or issues. You could look at trends in metrics like inventory turnover, sales-to-labor ratio, and profitability to see if there have been any changes over time.
For instance, you might see more under- or over-ordering as you add suppliers. That’s a sign to turn on purchase order sync and keep a tighter track of stock.
How to Avoid Common Shopify Accounting Mistakes and Issues
Although using an integration can streamline e-commerce accounting, there are still potential pitfalls. Even the most optimal setup could face challenges like employee resistance or user errors. These best practices keep your Shopify and QuickBooks Online data clean:
- Keep accounts consistent: giving products and customers different names and formats increases the risk of confusion. Decide on systems like weight, size, and color to ensure easy matching. For example, many international clothes stores use the US sizing system and add a comparison chart for the EU and UK.
- Verify the data: check for accuracy as well as consistency. If you’ve recorded crucial data like fees or prices incorrectly, you don’t want to risk copying that to QuickBooks and filing taxes incorrectly.
- Decide how often to sync: more frequent isn’t always better. While you’re finding your feet, an hourly sync gives you a window to catch errors before they reach QuickBooks. MyWorks lets you choose from every five minutes to once an hour.
- Stay updated with changes: as ecommerce accounting changes, software providers will add new features. Keep ahead of the competition by regularly checking what’s on offer and making sure you’ve got all the tools you need.
- Manage user access: employees may not need access to the system to perform their tasks. To minimize the risk of errors or accidental data leaks, give staff individual accounts with unique login and password details.
- Train your team: some staff may be unfamiliar with ecommerce accounting software. A quick walkthrough makes everyone more comfortable and gets more out of the tool.
Automatically Record Shopify Sales in QuickBooks Online with MyWorks
MyWorks is the easiest way to reconcile Shopify with QuickBooks. With MyWorks, you can:
- Automatically sync Shopify sales to QuickBooks Online as invoices, receipts, or sales orders.
- Match products and customers between Shopify and QuickBooks to keep records consistent.
- Track inventory changes in real time to maintain accurate stock levels.
- Handle multi-currency transactions if you sell internationally.
- Customize how data transfers between Shopify and QuickBooks Online to fit your business processes.
MyWorks stands out due to its ease of use, high level of customization, and quality customer support. You can tailor your sync to your exact business needs and let the automation handle most of the accounting. That way, you free up your time to focus on introducing new products, finding untapped markets, and expanding your operations.
Ready to stop recording Shopify sales manually? Try MyWorks for free to simplify your Shopify and QuickBooks accounting.
Record Shopify Sales in QuickBooks Online FAQs
Find answers to common questions about reconciling Shopify sales in QuickBooks.
1. How Do I Record a Sales Transaction in QuickBooks Online?
To automatically record a sales transaction in QuickBooks, you need to sync QuickBooks with your e-commerce platform, such as Shopify or WooCommerce. This is a straightforward process if you use e-commerce accounting integration software like MyWorks.
2. How Do I Import Sales from Shopify to QuickBooks Online?
Use e-commerce accounting integration software like MyWorks to connect your Shopify store to QuickBooks. MyWorks acts as a bridge between Shopify and QuickBooks, automating the data transfer process.