
Instagram is a thriving marketplace with over 57 million shoppers worldwide. With an impressive 21.9% conversion rate, it’s a top choice for store owners looking to boost their online sales. Continue reading to discover how to set up an Instagram shop, connect it to Shopify, and make your first sale.
Why sell Shopify products on Instagram?
Shopify users can sync their stores with Instagram to sell their products on the platform and benefit from its features. These include:
- Storefront: A page where you can advertise and sell all your products
- Collections: A tool that lets you categorize your products so they’re easier to browse
- Shopping tags: Links that allow you to redirect customers to your Shopify site
- Product pages: A page with all the details about your product including the photos, pricing, and variants plus the description
- Ads: Shoppable posts that appear in people’s feeds and searches
Who can open a store on Instagram?
Users must meet five main requirements to use Instagram’s commerce features. You must:
- Comply with Meta’s policies: All users must agree to follow the platform’s Terms of Service and Community standards.
- Represent the store: In other words, your Instagram products should match the ones on your website.
- Run your store from a supported country: Instagram’s commerce features are currently available in 22 countries including the US, the UK, and Canada.
- Establish a presence: Meta may remove your account if you have very few followers or limited details about your company. A weak presence suggests you’re a scammer.
- Follow best practices: Your store policies should be accurate, up to date, and easily available.
Note that all users must also comply with local and international laws and regulations. Even if companies like Meta don’t explicitly state these requirements, you’re still subject to them.
Who can sell on Instagram?
Only US stores can sell directly from Instagram using the checkout. All other countries can redirect users to their Shopify store.
That means you must be operating from the US. You can’t claim to be in the country to access these features as Meta can see your IP address and block you.
How to set up Instagram for Shopify
In this section, we’ll guide you through the essential steps to setting up your Instagram shop and syncing it with Instagram.
All you need is a Shopify store and Facebook profile to get started. You must be the administrator of both these accounts to authorize the downloads and changes.
1. Start an Instagram business profile
If you haven’t already, create an Instagram account. You can open one instantly with any Facebook login details as Meta owns both platforms.
Go to your profile page and scroll to ‘Account type and tools’ in the menu. Instagram gives you the option of a creator or a business account.
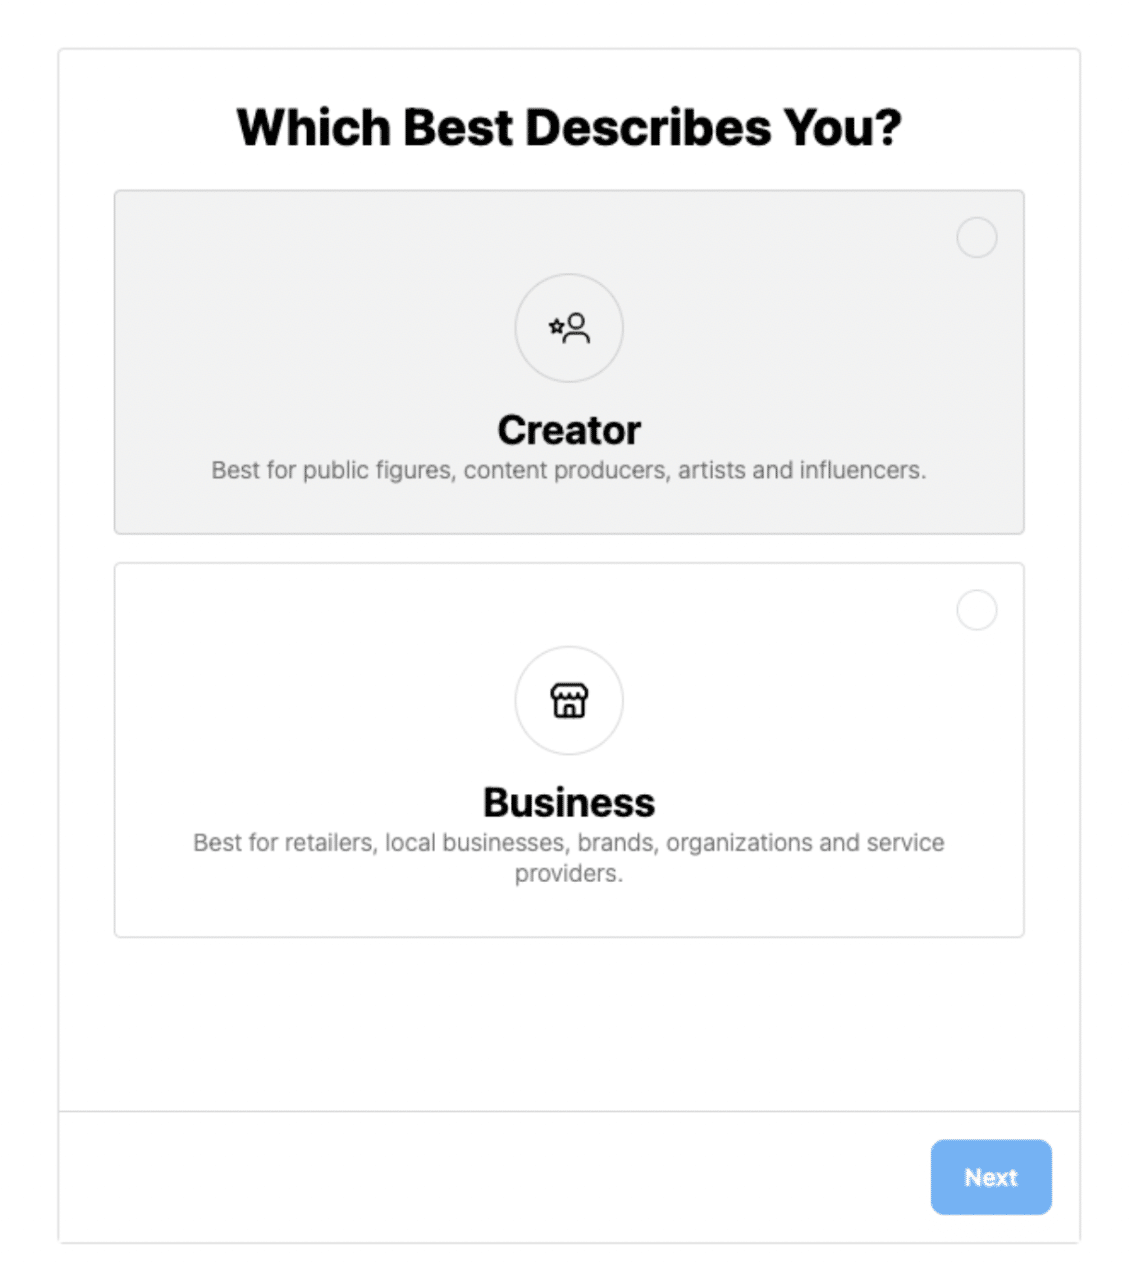
Click ‘Business’ and go through the prompts. Note that your shop immediately becomes public once you’ve confirmed.
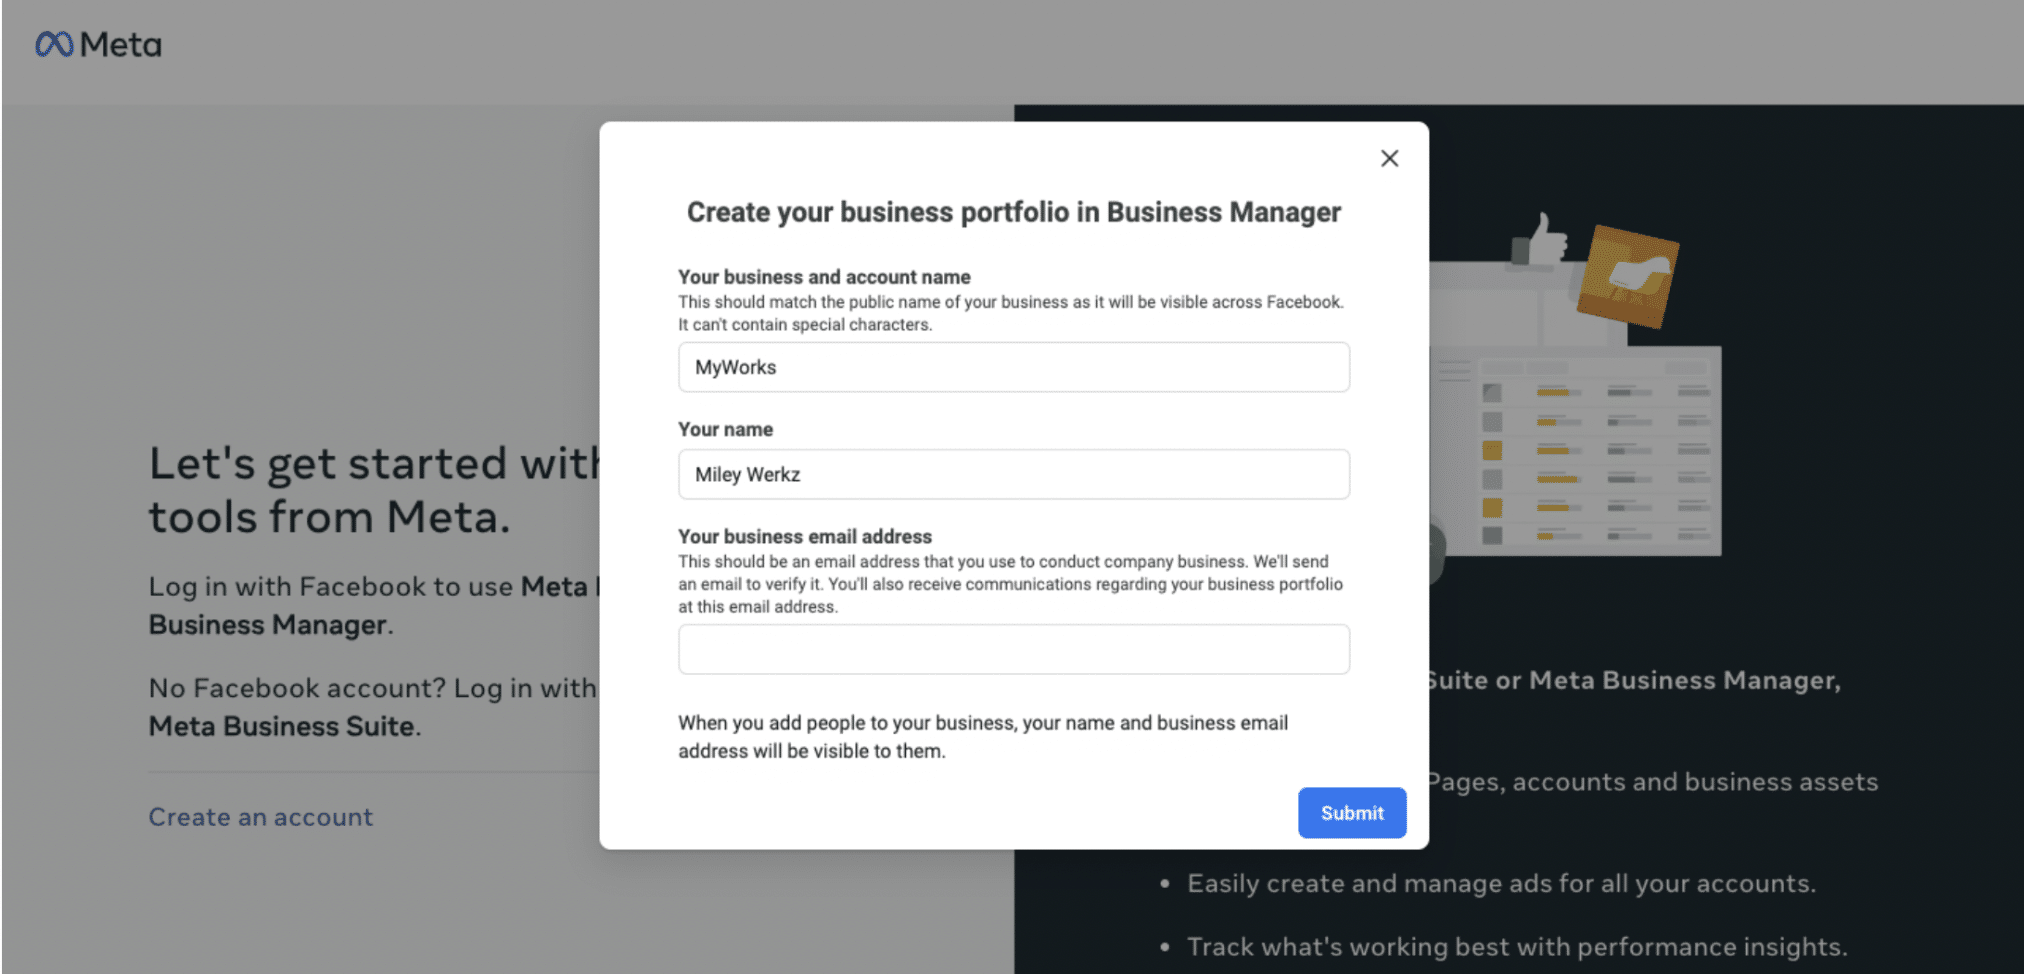
2. Open a Meta Business Manager and Ad account
Open a Meta Business Manager account by signing in with your Instagram details. Note that the name is gradually changing to ‘Meta business portfolio’.
Add your account by going to ‘Settings’ and ‘Add a page’. The platform will reveal a drop-down menu with a list of linked accounts.
From inside Meta Business Manager, you need to open an Ad account. Go to:
- Settings
- Ad accounts
- Add an ad account
From the drop-down menu, choose the Instagram business you want to open the Ad account with.
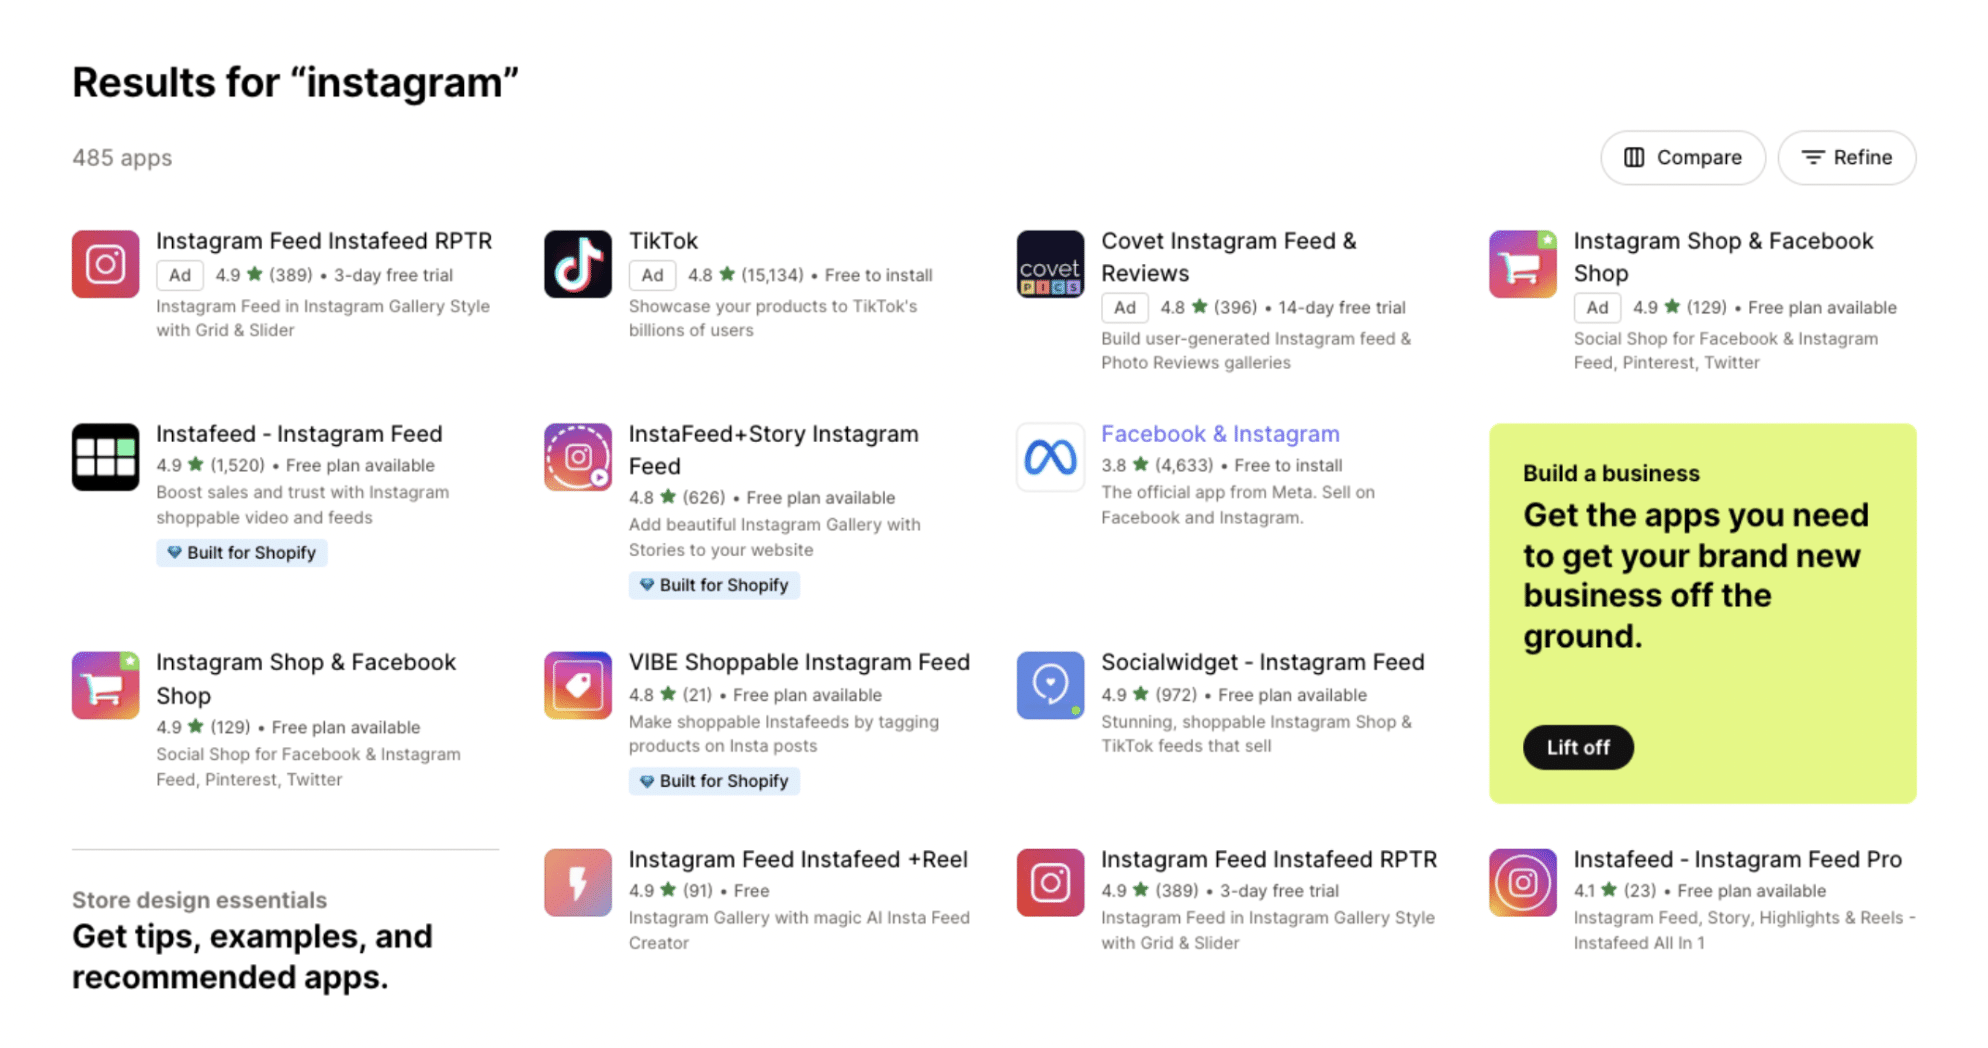
3. Install the Facebook and Instagram Shopify App
Head to the Shopify app marketplace and search for the Instagram sync.
There are many options. The official Meta app has the company’s blue infinity logo. If you’re unsure, check the name listed under ‘Developer’.
If you have multiple stores, Shopify will ask which one you want to connect. Select the one you want from the menu.
Then it’s a matter of following the prompts. To authorize the installation, click:
- Add Channel
- Update sales channel
- Start setup
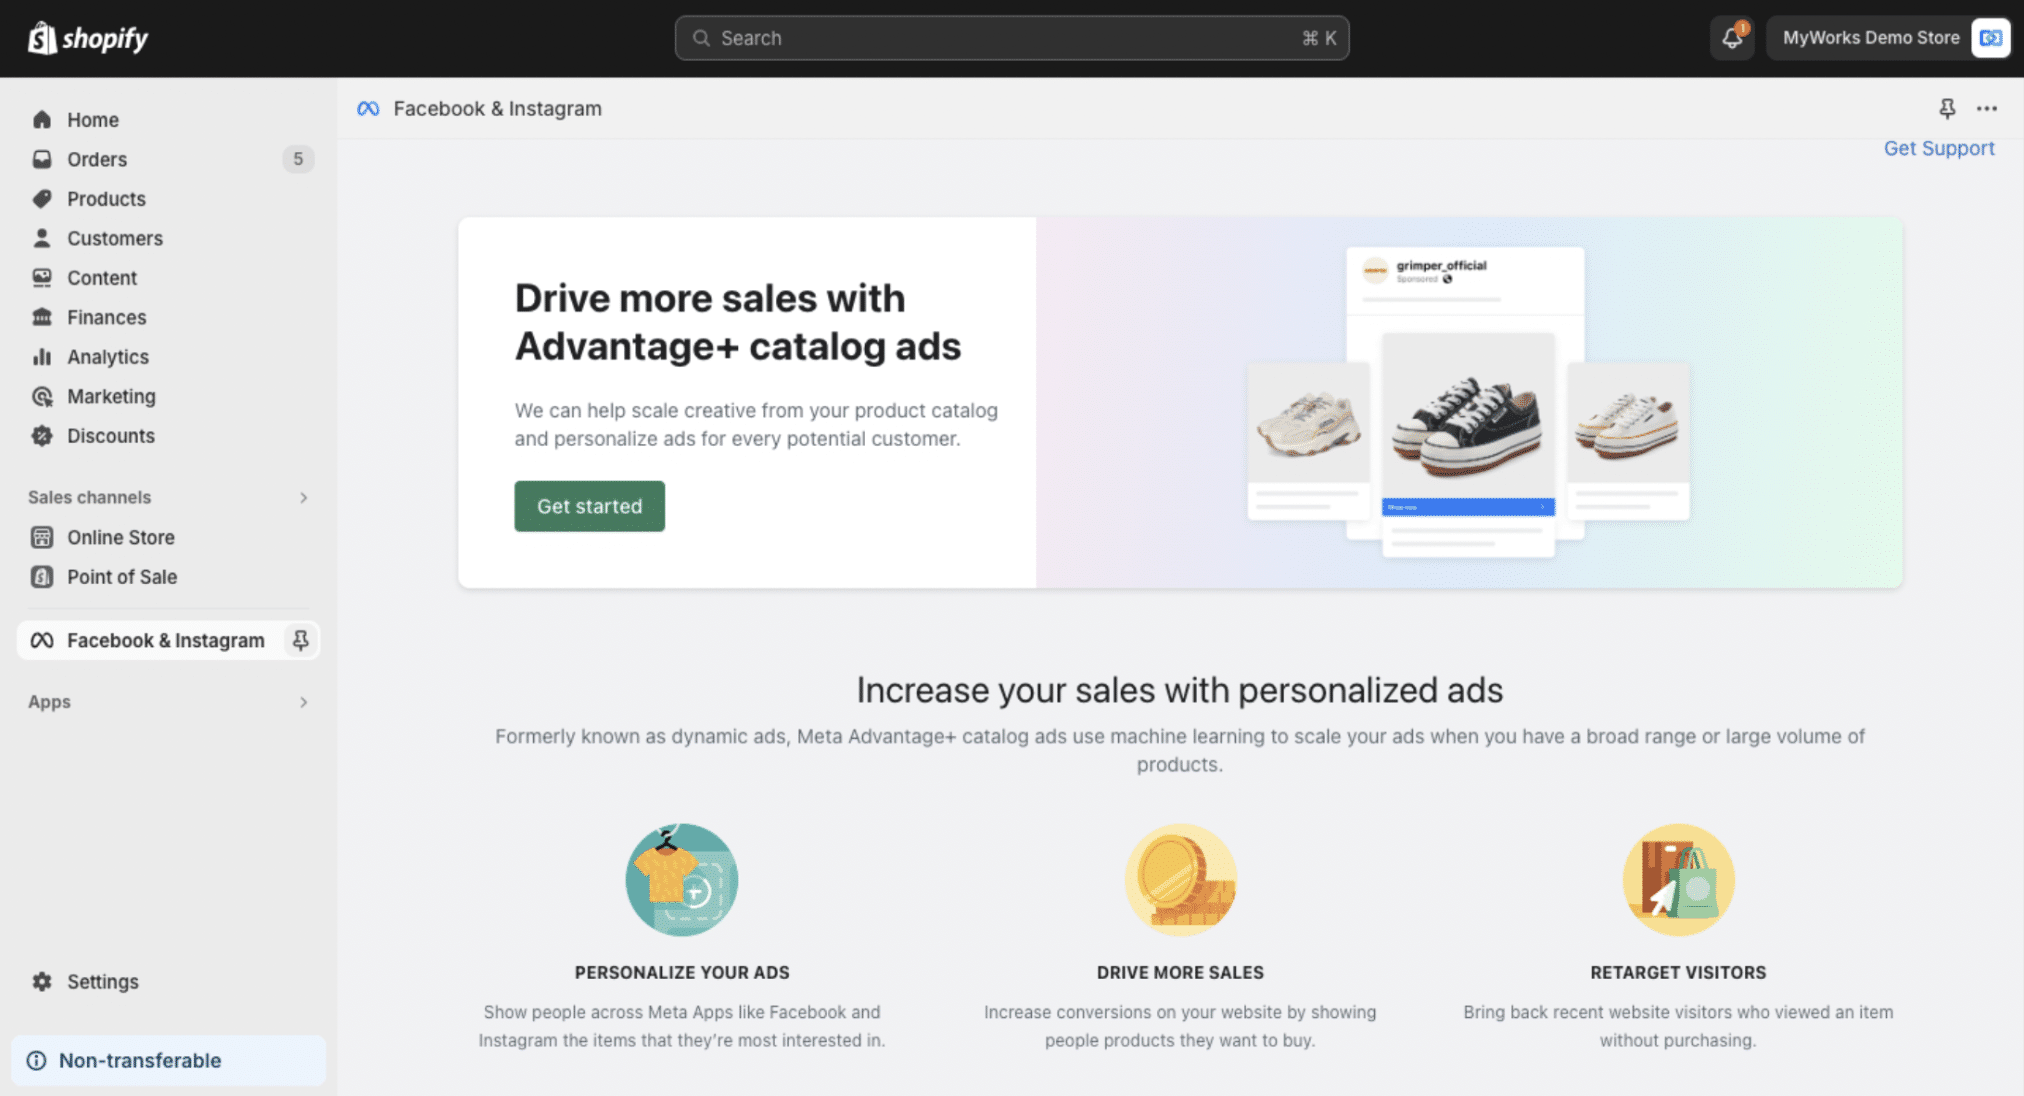
4. Connect your Instagram account to Shopify
Once you’ve installed the app, you need to connect your Instagram account. Go to the Facebook and Instagram app in your Shopify dashboard.
Click ‘Connect account’ and then ‘Continue’ in the box that appears.
Shopify will ask which Meta business account you want to connect if you’ve got more than one. Just select the one you want from the list.
5. Sync your Shopify and Instagram accounts
The Facebook and Instagram sync will ask for your data sharing preference. There’s a choice of Conservative, Enhanced, and Maximum. These accounts are in order of least to most data shared.
The app also shows you individual data sets like payment info and customer ID so you can adjust the settings manually.
Afterward, Shopify will display a blue box with the option to ‘Publish products’. Use this to sync your store.
6. Check your Shopify Instagram sync
Click on the ‘Shopify Product Catalog’ hypertext to navigate to your Meta Business Manager dashboard. You should see your approved products listed there.
If not, find the ‘Issues’ tab in the sidebar to identify and fix the problem. Meta will display a red ‘!’ symbol next to any missing details you need to fill in.
Sometimes, the product catalog may not be up to date. Go to ‘Data sources’ to check the last time the apps synced.
7. Start selling via Instagram
Now your products should be visible to Instagram users.
When you make a sale, Shopify notifies you about the order and processes the payment. You can then log into your store to view the details and manage fulfillment as you would normally.
8. Record Instagram sales in your books
The Facebook and Instagram sync automatically shares sales and order data with Shopify. That means you can view and manage this information via your store dashboard.
However, none of these platforms share data with bookkeeping software like QuickBooks or Xero. You need an ecommerce accounting sync like MyWorks to connect them. MyWorks lets you share data from your Instagram, Facebook, and other sales channels so you can keep your books up to date and avoid costly errors.
Selling on TikTok? MyWorks lets you sync Shopify data from your shop there too.
How to adapt your Shopify sales strategy for Instagram
Launching an Instagram shop doesn’t just get more eyes on your products. As a social media platform, it empowers you to connect more with customers and develop a stronger brand.
Here are the best strategies to make the most of Instagram’s features and your new audience:
- Create a catchy profile: Browsers may click on your Instagram page to learn more about your store. Your profile picture and bio should stand out while explaining clearly what your business does.
- Show your human side: Engaging your audience will make them feel more loyal to your brand. You can share posts that reveal the faces and stories behind your store like introductions to team members or videos about how you make certain products.
- Take advantage of stories: Instagram stories are great for sneak peeks at new promotions or events you’re holding. You can also create interactive content like polls and quizzes to learn more about your customers.
- Invest in your photography: Visuals are key on Instagram so make sure you’ve got good technique and high-quality equipment. Keeping your style consistent will help you create a cohesive and recognizable aesthetic.
- Make the best use of hashtags: Research which hashtags are popular and trending in your industry. You can use them to content ideas and ensure you get the furthest reach.
- Share customer posts: A brand hashtag allows customers to share photos they’ve posted of your products more easily. Featuring user-generated content helps advertise your store and fosters extra loyalty among followers.
- Write engaging captions: Instagram only lets users see a brief preview so start captions with a great hook. Use the rest of the description to tell a story or share interesting facts about your business.
Feel free to experiment in your early days while you find your voice. If your first few posts don’t hit the mark, they’ll soon get buried under hundreds of others. Your customers are only likely to interact with your most recent posts.
Time to bring your store to a wider audience
Although it’s hardly new, Instagram is still one of the most popular social media and commerce platforms on the market. Shopify owners can reach millions of new customers worldwide – and that number is still growing. If you’re growing a wholesale or B2B side to your business, check out our expert recommendations for the best shopify b2b app to streamline your operations.
For more strategies, see our How to Sell on Shopify Without Inventory guide.
Moving to Instagram doesn’t have to mean more work either. The Facebook and Instagram sync lets you share order and sales data between platforms.
MyWorks offers the final piece of the puzzle. Our deep integration empowers you to connect your QuickBooks account with Shopify and seamlessly share data across all these platforms.
| Looking for ways to automate time-consuming manual data entry?
Book a demo to see how MyWorks can streamline ecommerce accounting. |