If you manage your e-commerce business with WordPress and QuickBooks, you know how time-consuming it can be to sync data between both platforms manually.
However, a reliable e-commerce integration tool like MyWorks can automate this process and save tens or hundreds of hours on accounting and admin tasks. Our MyWorks Sync works directly with QuickBooks, WooCommerce, and, therefore, WordPress, keeping your store up to date with your records. WooCommerce is an online e-commerce platform that can be set up and used through your WordPress admin.
Follow this simple seven-step guide to sync QuickBooks and WordPress easily.
Step 1: Set Up WooCommerce
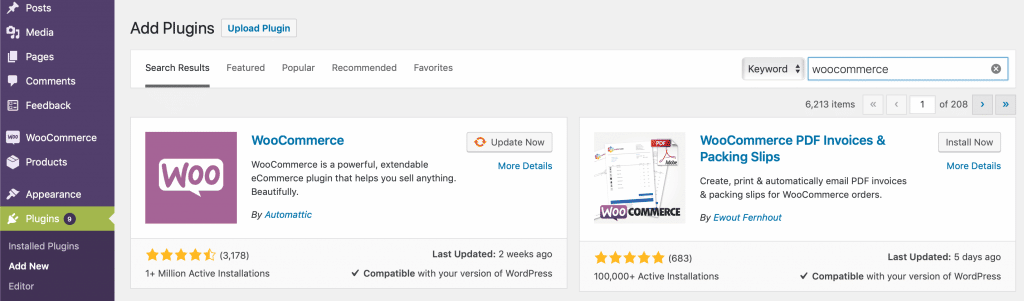
In your WordPress admin, install the WooCommerce plugin by going to Plugins > Add New in the sidebar. Once installed and activated, WooCommerce will appear in the sidebar menu.
When you open WooCommerce, click to run the Setup Wizard and follow the steps to set it up. With your new WooCommerce all set up, you’re ready to move on to the next step!
Step 2: Install MyWorks Sync
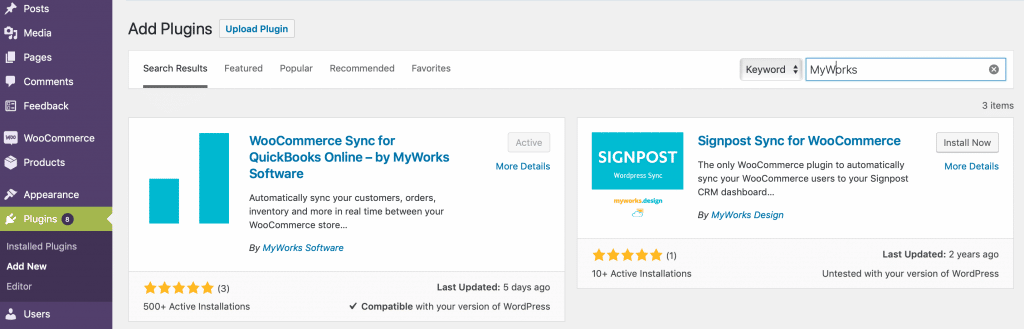
If you’re looking to sync with QuickBooks Online, you can download the MyWorks plugin from WordPress Admin. Alternatively, if you want to sync with QuickBooks Desktop, you can download the sync from the Client Area on the MyWorks website once you sign up.
Once you install and activate the MyWorks Sync, it will appear near the top in the sidebar and will be ready to be configured and used.
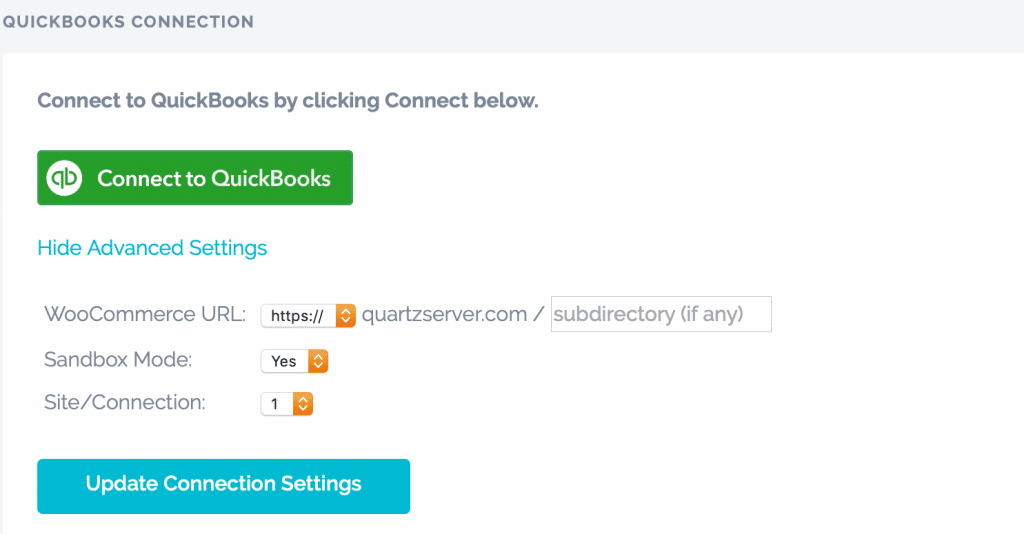
Step 3: Connect WooCommerce and QuickBooks
How to connect MyWorks to QuickBooks Online:
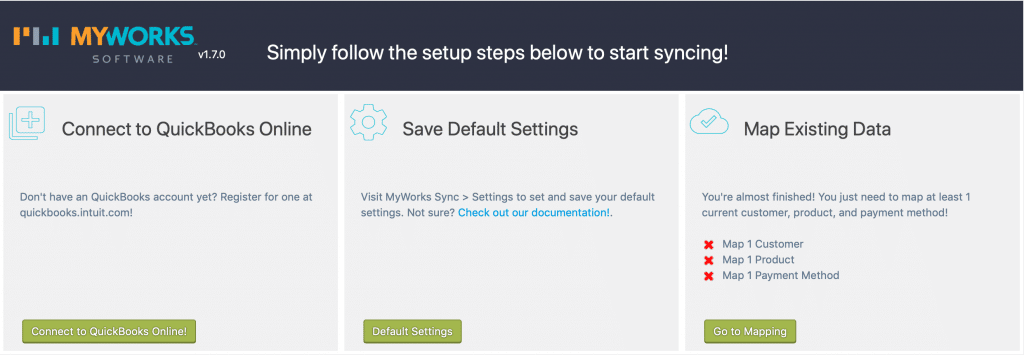
- When you open MyWorks for the first time, you’ll see an easy-to-follow setup menu at the top. Click on the first box to access the page where you can connect the two platforms.

- Input your license key and press “enter.” You can find your license key in your MyWorks account Client Area.
- Next, you’ll log into your QuickBooks via the QuickBooks API. If you are using QuickBooks in Sandbox mode, remember to set that in Advanced Settings.
How to connect MyWorks to QuickBooks Desktop
- The connection process is slightly different with QuickBooks Desktop. You’ll use the QuickBooks Web Connector, which usually comes with your QuickBooks Desktop installation. Follow our quick guide to set it up.
After you’ve installed and activated the MyWorks Sync, you’re ready to start personalizing! Check this page to know more about our Quickbooks sync for Woocommerce.
Step 4: Configure Settings
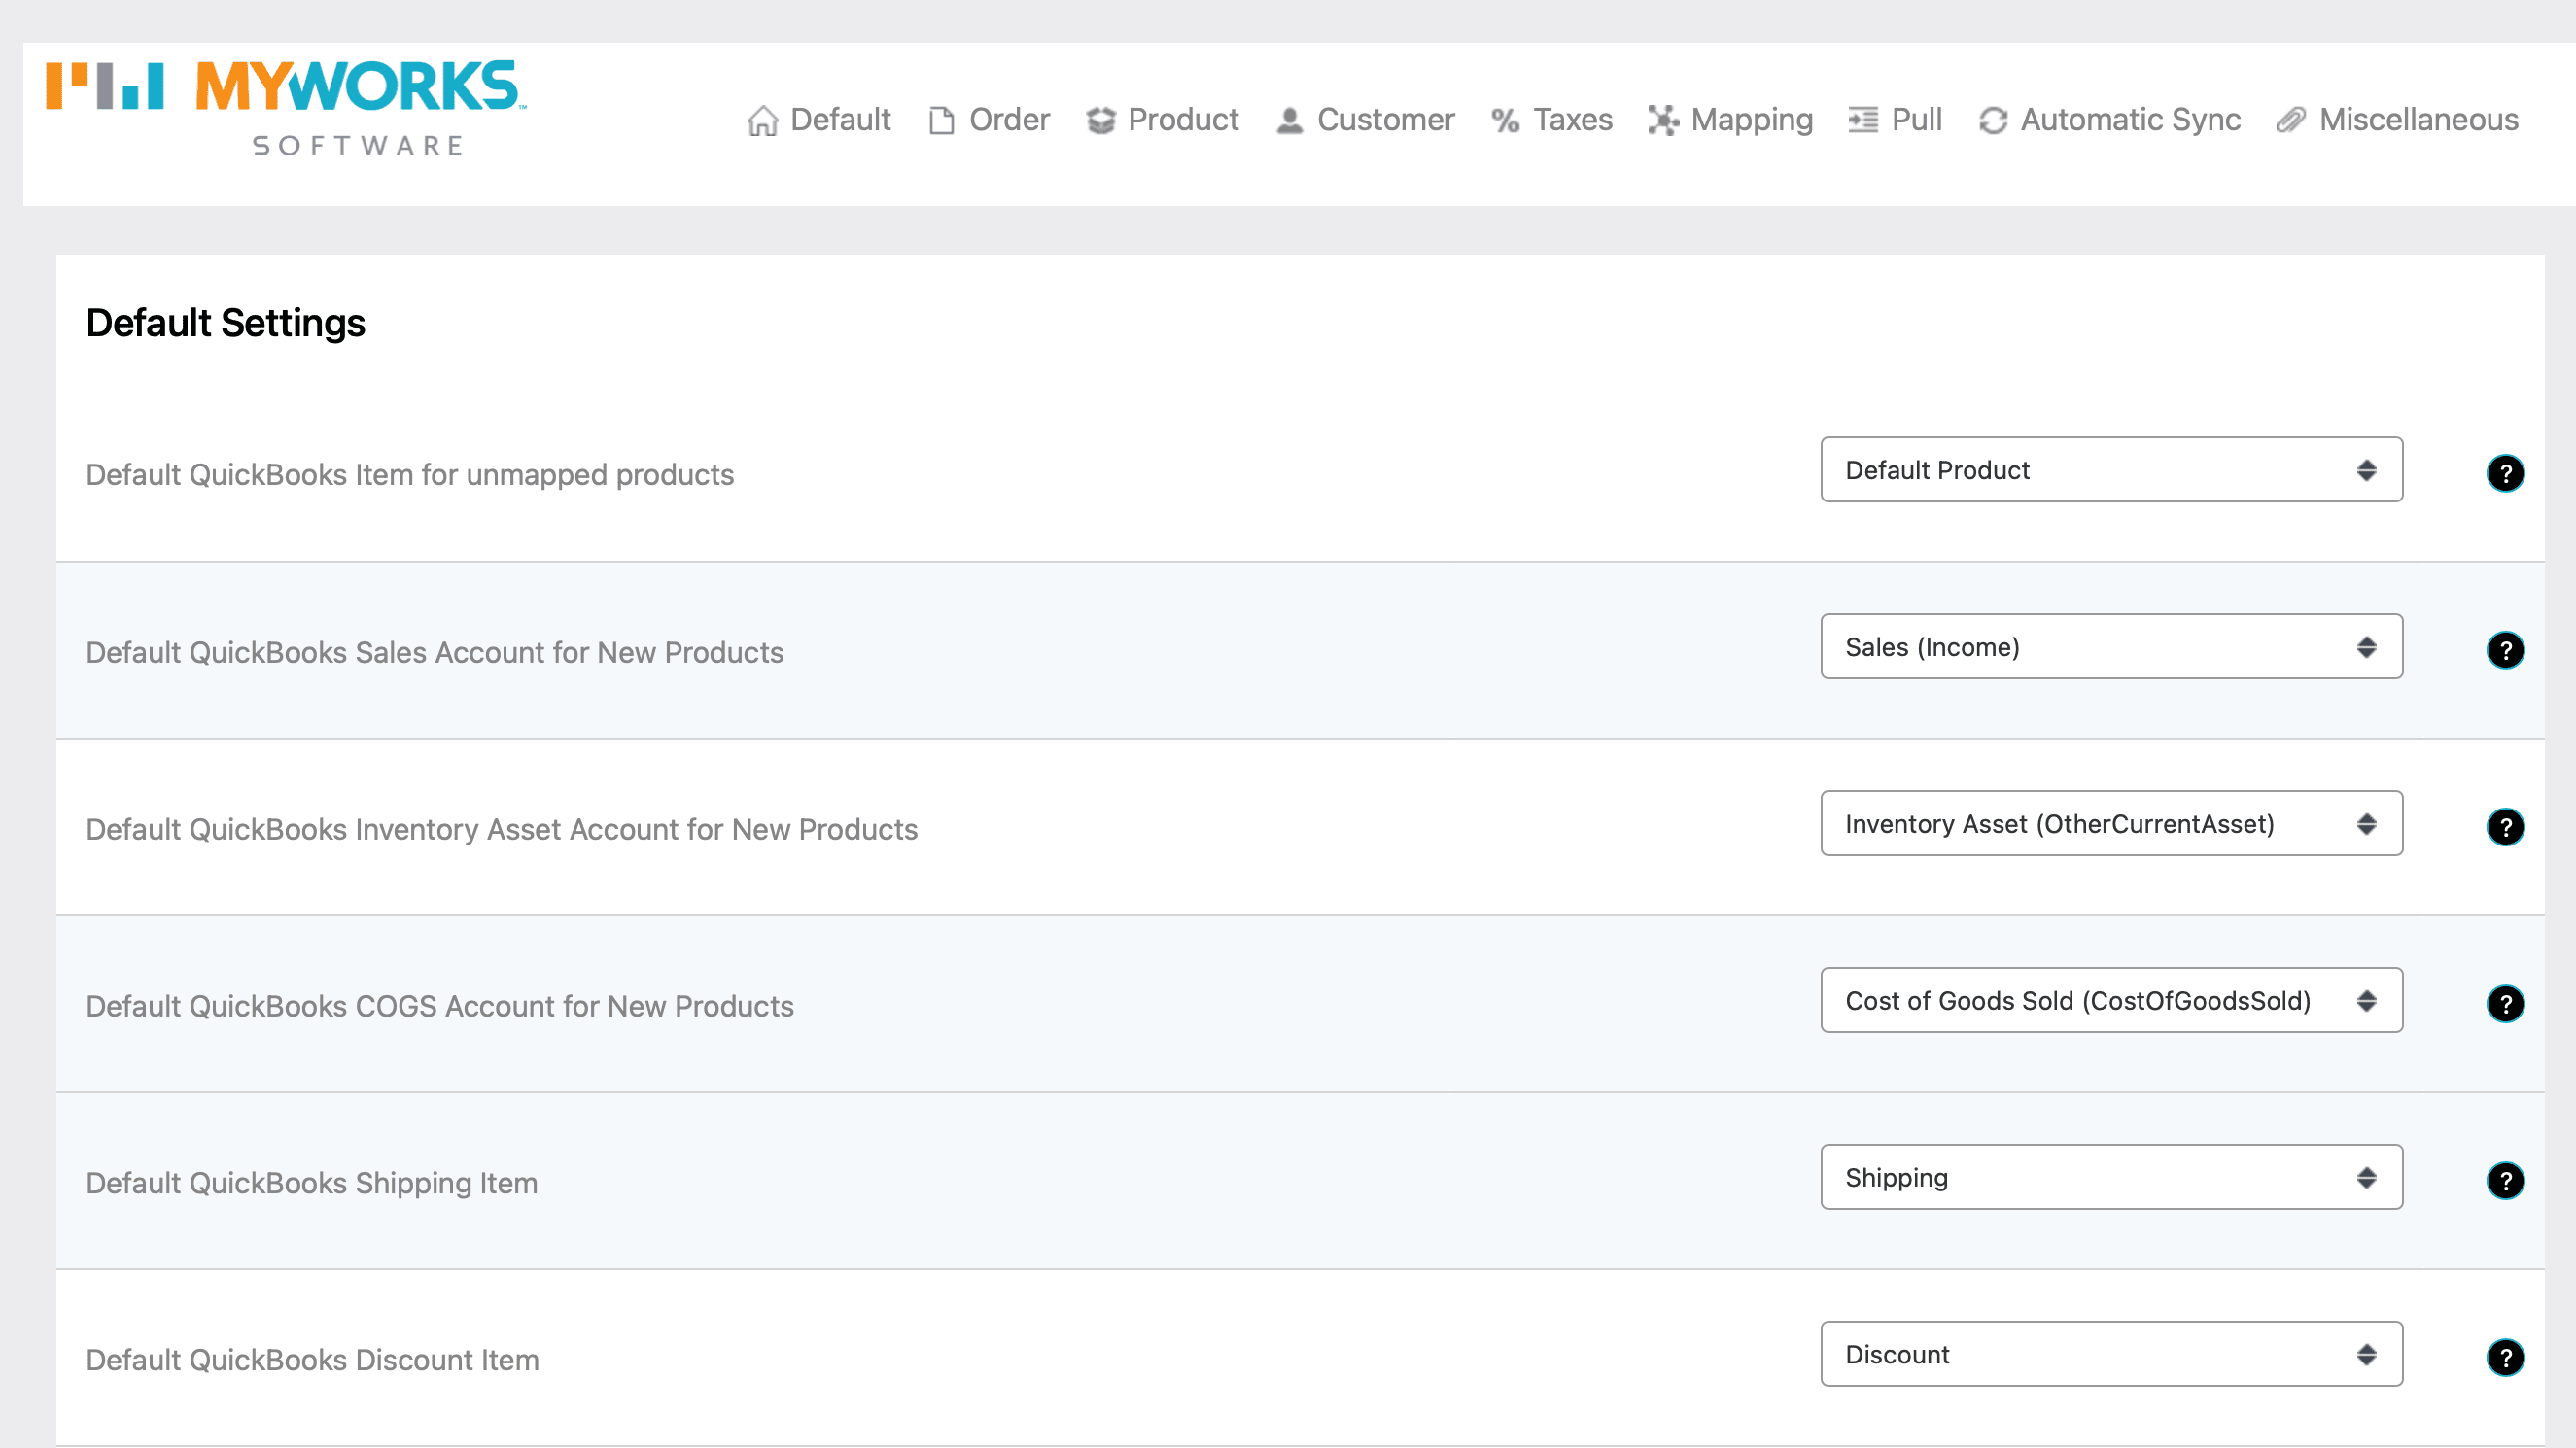
The next step in the setup is to Set your Default settings. This is the perfect time to configure other aspects of the tool, including whether to sync automatically in Real-Time or in Queue, your pull settings, mapping, products, orders, and tax settings.
Remember to press save at the bottom of each page; you’re all set with your settings. Here’s a detailed guide on how to configure settings in MyWorks.
Step 5: Map Data
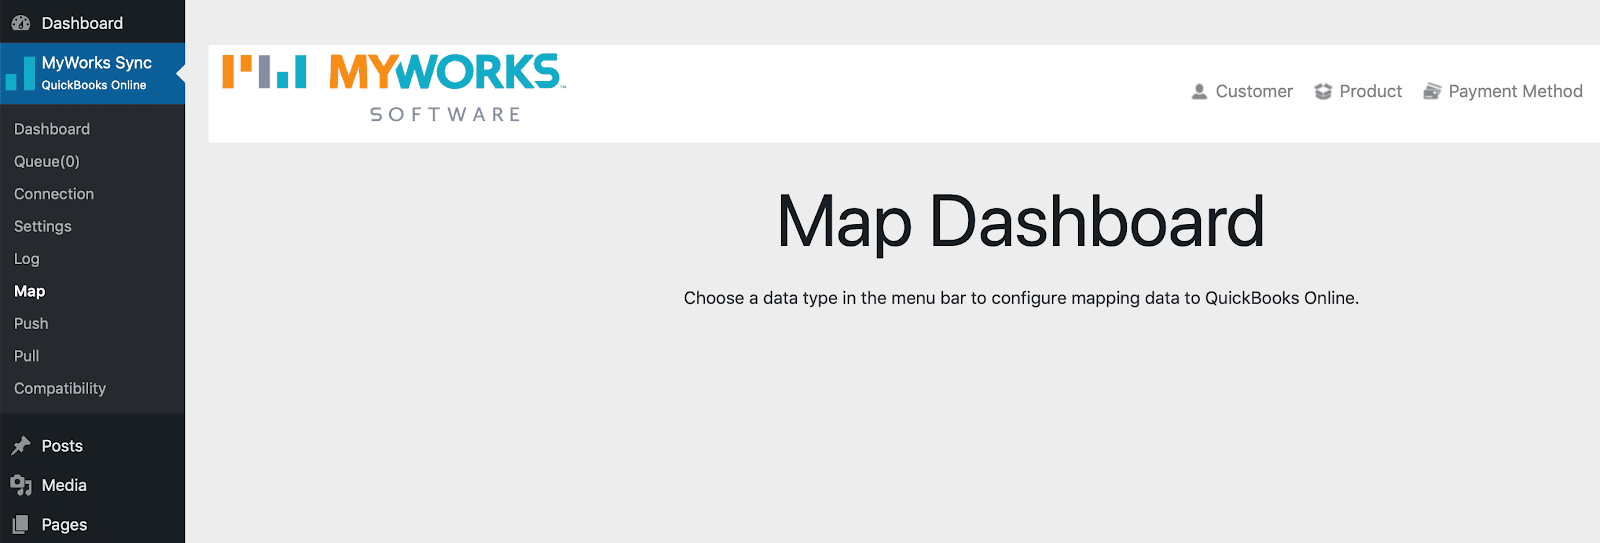
To finish the initial setup, you must map at least 1 product, customer, and payment gateway. To access the mapping page, click on the button in the final box of the setup steps.
Here, you can map your existing customers, products, payment methods, and shipping methods (if applicable). You can use our auto-map to do this quickly, or you can do it manually by matching the correct item via the drop-down list.
Follow our detailed mapping guide to set it up quickly.
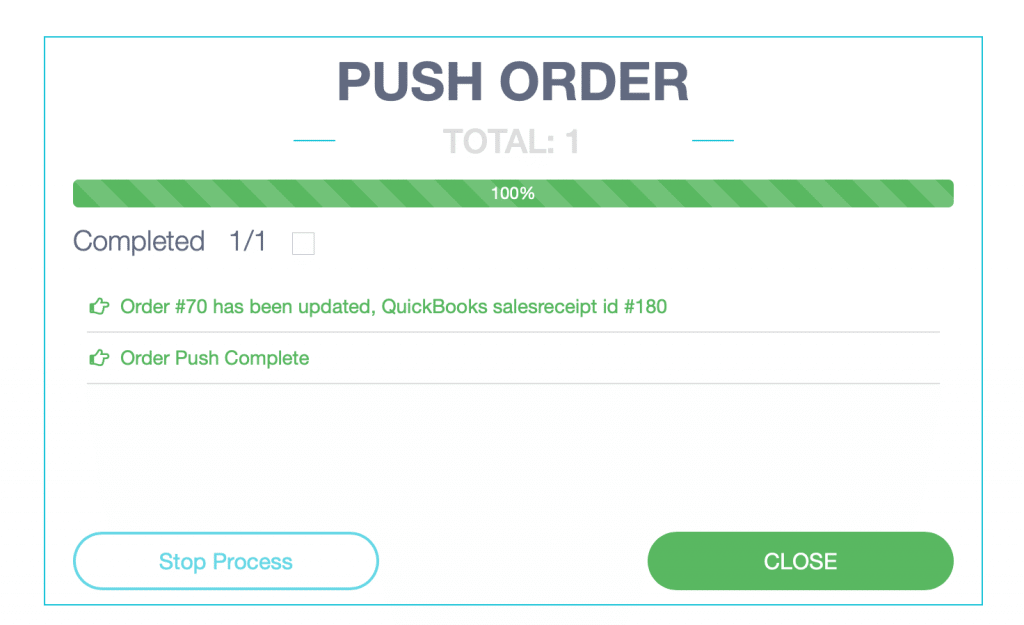
Step 6: Push/Pull Data
Now, it’s time to get your existing data into both platforms. If you are using the MyWorks sync with completely new QuickBooks and WordPress accounts, you probably don’t have any existing data, so there’s no need to push or pull anything, and you can easily skip this step.
If you DO have existing data, follow these steps to set things up:
- Select your customers and products in WooCommerce from the Push tab to push them into QuickBooks.
- Similarly, if you’ve toggled on the Pull option in your settings, there will be a Pull tab in the sidebar.
- Go here to pull existing data from your QuickBooks into your WooCommerce. Select the data to import into WooCommerce and pull the selected products.

- Once the Push/Pull is complete, close the window that pops up. All the data you’ve just pushed or pulled is now on both platforms! You should see something like this on your screen.
Step 7: Sync
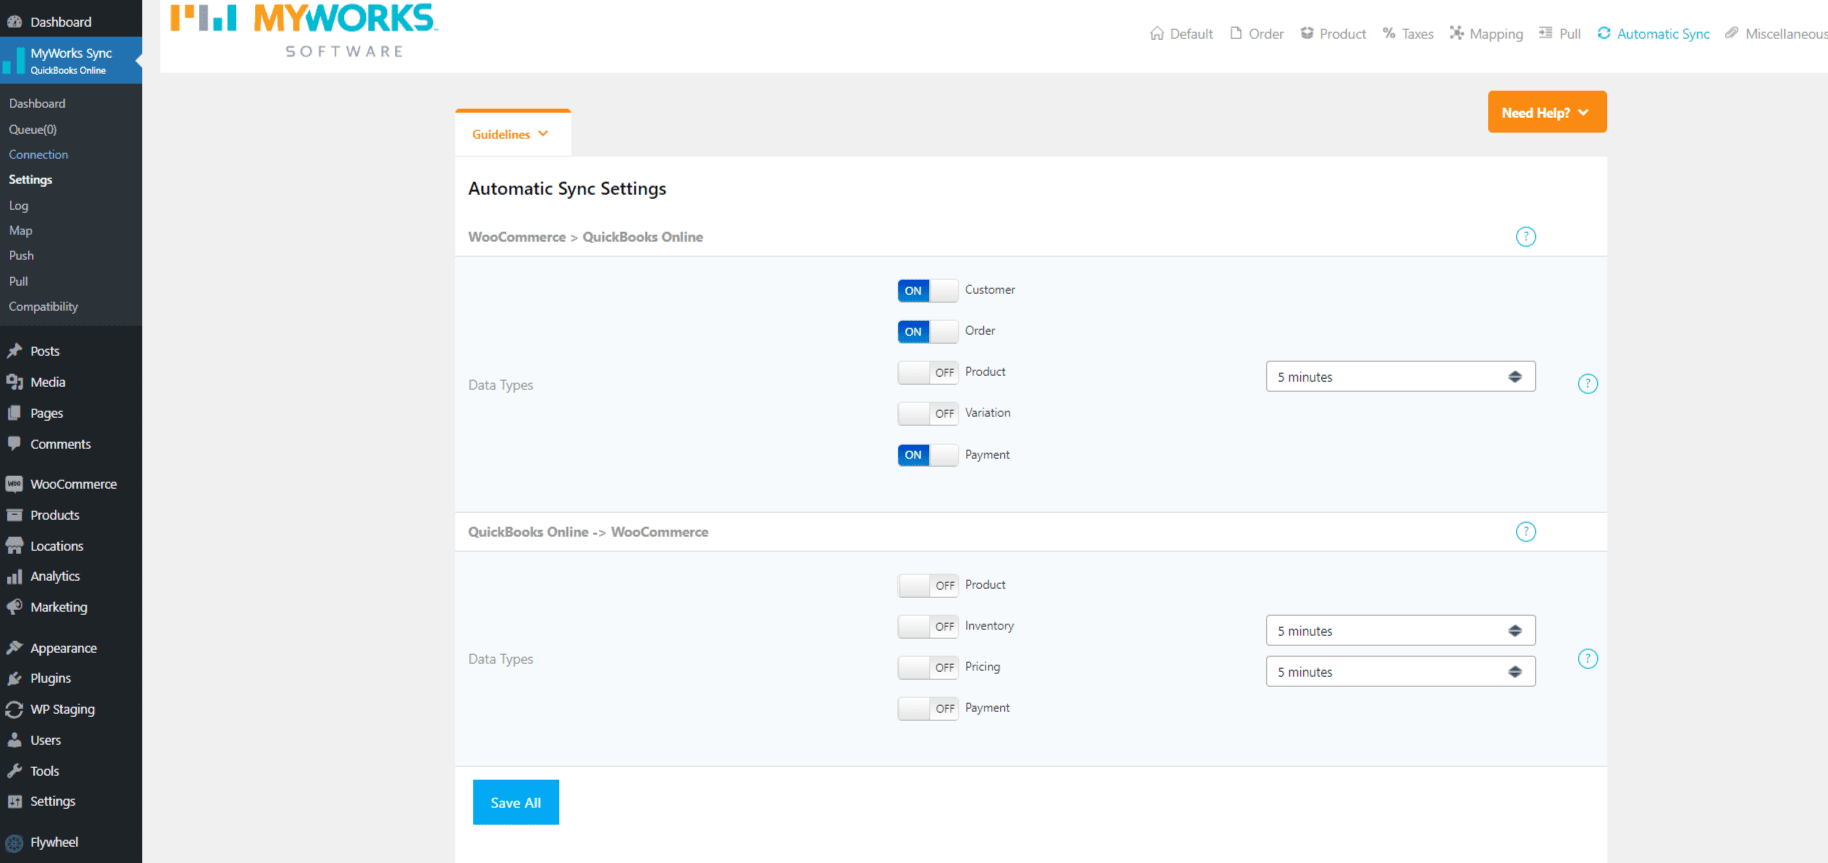
You’ve done it all — the installations, the connections, the settings. Now, it’s finally time to sync. You have two options:
- Queue sync: Your data will sync between the two platforms at a specific time interval, for example, every 10 minutes or every hour.
- Real-time sync: If you set it to sync in real-time, new customers, products, and orders created in WooCommerce will be synced straight to QuickBooks!
Why Use MyWorks to Sync QuickBooks and WordPress?
With two-way sync, an easy-to-use platform, and flexible pricing, MyWorks stands out as the most preferred accounting integration solution for e-commerce businesses.
It offers:
- Automated data entry: reduces the need for manual entry of sales and customer data, minimizing errors and saving time.
- Real-time update: ensures that both platforms are up-to-date with the latest information, improving financial reporting and inventory management accuracy
- Improved efficiency: streamlines business operations by integrating the e-commerce and accounting processes, allowing business owners to focus on growth rather than data management
Check out MyWorks pricing plans to see what fits your ecommerce accounting integration needs. Need more information about WooCommerce and QuickBooks? Dig into our extensive documentation: