
As an online store owner or manager, you know it’s important to keep your inventory numbers up to date. Having the wrong inventory levels on your store could mean you end up selling products you don’t have in stock and having to deal with cancellations… It could also mean missing out on sales due to products showing out of stock when they’re really in stock.
We all know that WooCommerce isn’t the only platform you’re going to use. Whether you’re selling in another channel like Amazon, fulfilling orders with a service like ShipperHQ or using an accounting software like QuickBooks, that means you have to keep track of inventory in more than one place.
WooCommerce does a great job of managing inventory—all you have to do is enter your starting inventory, and the platform itself will subtract any sold units from your inventory levels. But what about QuickBooks? In most cases, store owners have to update those numbers manually, whether you’re selling an order directly from within QuickBooks or receiving new inventory in stock.
So what’s the best way to keep those inventory numbers in sync? The answer depends on your workflow and preferences. How often do your inventory numbers change? Who accounts for your inventory? How often do those numbers change, and do you receive shipments from different locations?
For some, it makes sense to manage inventory only in WooCommerce. For others, it makes more sense to manage it in QuickBooks. Each of these has a downside – either not knowing the value of inventory you have on hand in QuickBooks or not being able to manage/limit how much you’re selling in WooCommerce.
Once you’ve decided in which system you’ll be updating inventory and how you’d like this to be represented in the other system, you should be able to decide if you need an integration to keep inventory levels (as well as customers, orders, payments, and more) automatically in sync between WooCommerce and QuickBooks. If this is the case, we recommend you take a look at our QuickBooks Sync for WooCommerce.
One way to keep your inventory completely in sync across WooCommerce and QuickBooks is to connect the two platforms via our MyWorks Sync for WooCommerce QuickBooks integration.
Here’s how you integrate WooCommerce and QuickBooks to keep your inventory in sync across both platforms.
There are just a few simple steps required to set up, and they can typically be completed in under 20 minutes.
The first step is to connect your WooCommerce store with QuickBooks. Simply install our plugin from your account with us, and for QuickBooks Online, click the button to connect to your QuickBooks Online account. For QuickBooks Desktop, download the connection file and add it to your Web connector.
Next, you need to map your WooCommerce products with your QuickBooks products. There are a few different ways to do this, and it just depends on whether your products already exist on both ends or only on one platform.
If you already have your products created in WooCommerce and QuickBooks, you only need to map them.
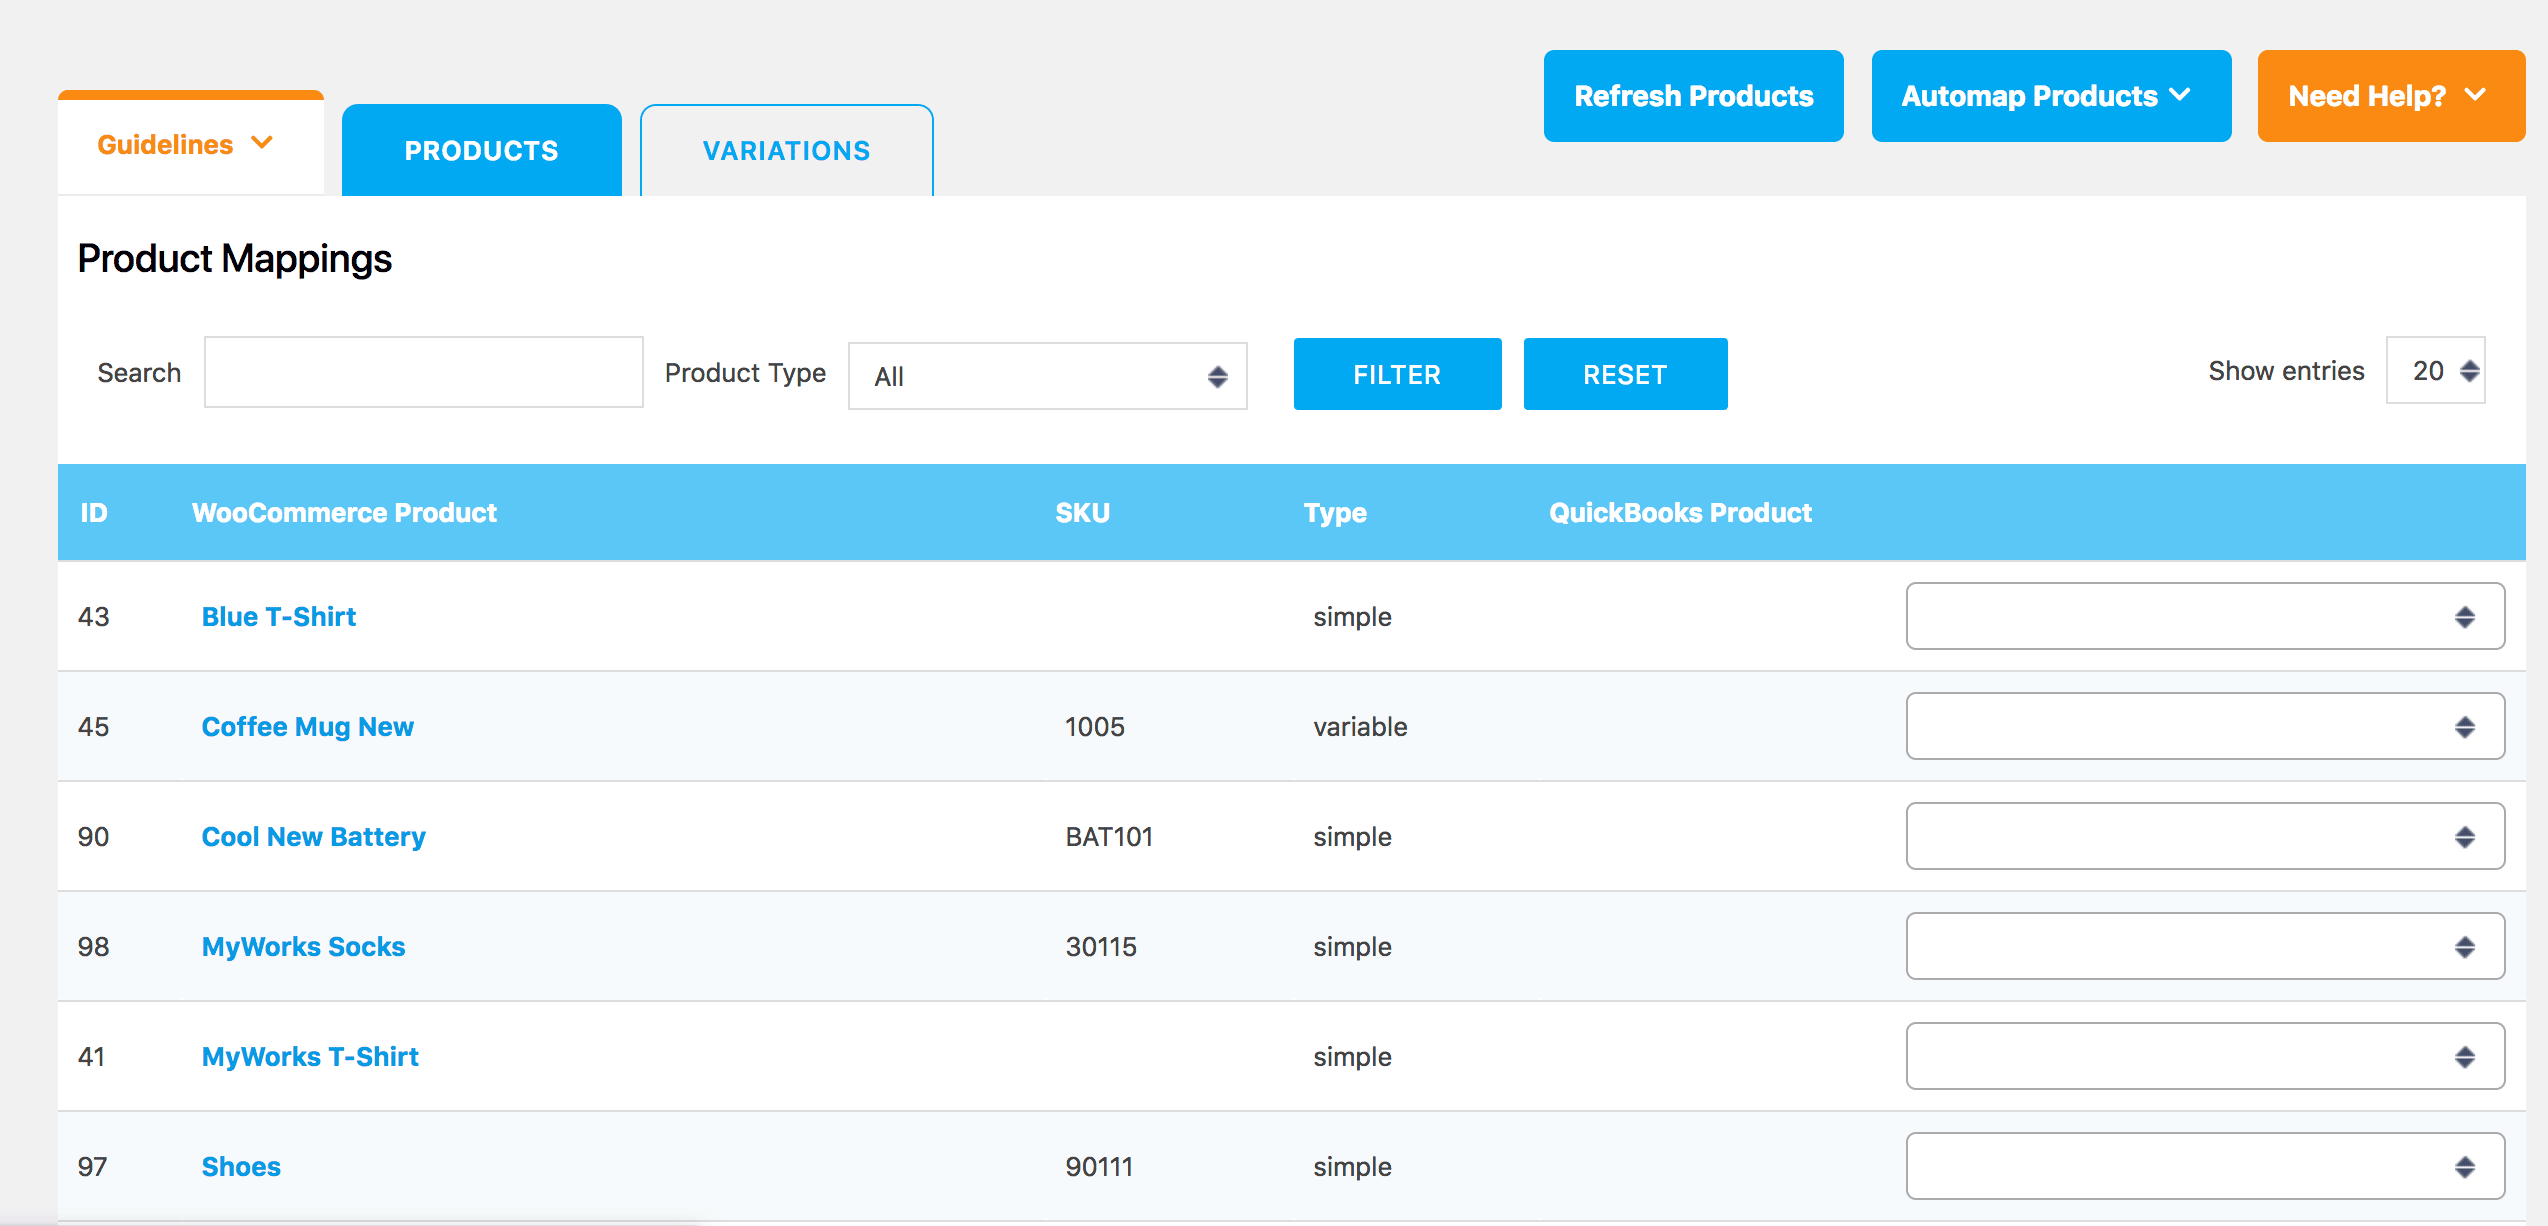
We head over to our product mapping page… and you will see our WooCommerce products on the left and, on the right side, a drop-down to select the corresponding QuickBooks product. You may match any product to any product – the names and SKUs do not need to match. However, if they do, you may use our auto-map tool to match products automatically. This can be especially useful if you have a lot of products. To use this feature, just decide whether you would like to use the name or SKU as the field to match your products, and then click the “auto-map” button. Once you have filled out all of your drop downs, your products are mapped!
Keep in mind that this is a one time process – any future products created can be automatically synced to QuickBooks and matched together.
Now what if you don’t have your products in QuickBooks, or if you only have a few of them in QuickBooks? That’s not a problem – you may actually use our integration to “push” those WooCommerce products into QuickBooks. When you push your products to QuickBooks, they are created there, and they are automatically mapped!
Now, the next thing we want to do is make sure that WooCommerce inventory sync is turned on. Most of our sync settings are controlled from the WooCommerce Automatic Sync tab within the integration settings; let me show you.
As you can see, we have a section from sync settings from WooCommerce to QuickBooks, as well as a section from QuickBooks to WooCommerce. You may enable WooCommerce inventory syncing from WooCommerce to QuickBooks, QuickBooks to WooCommerce, or both!
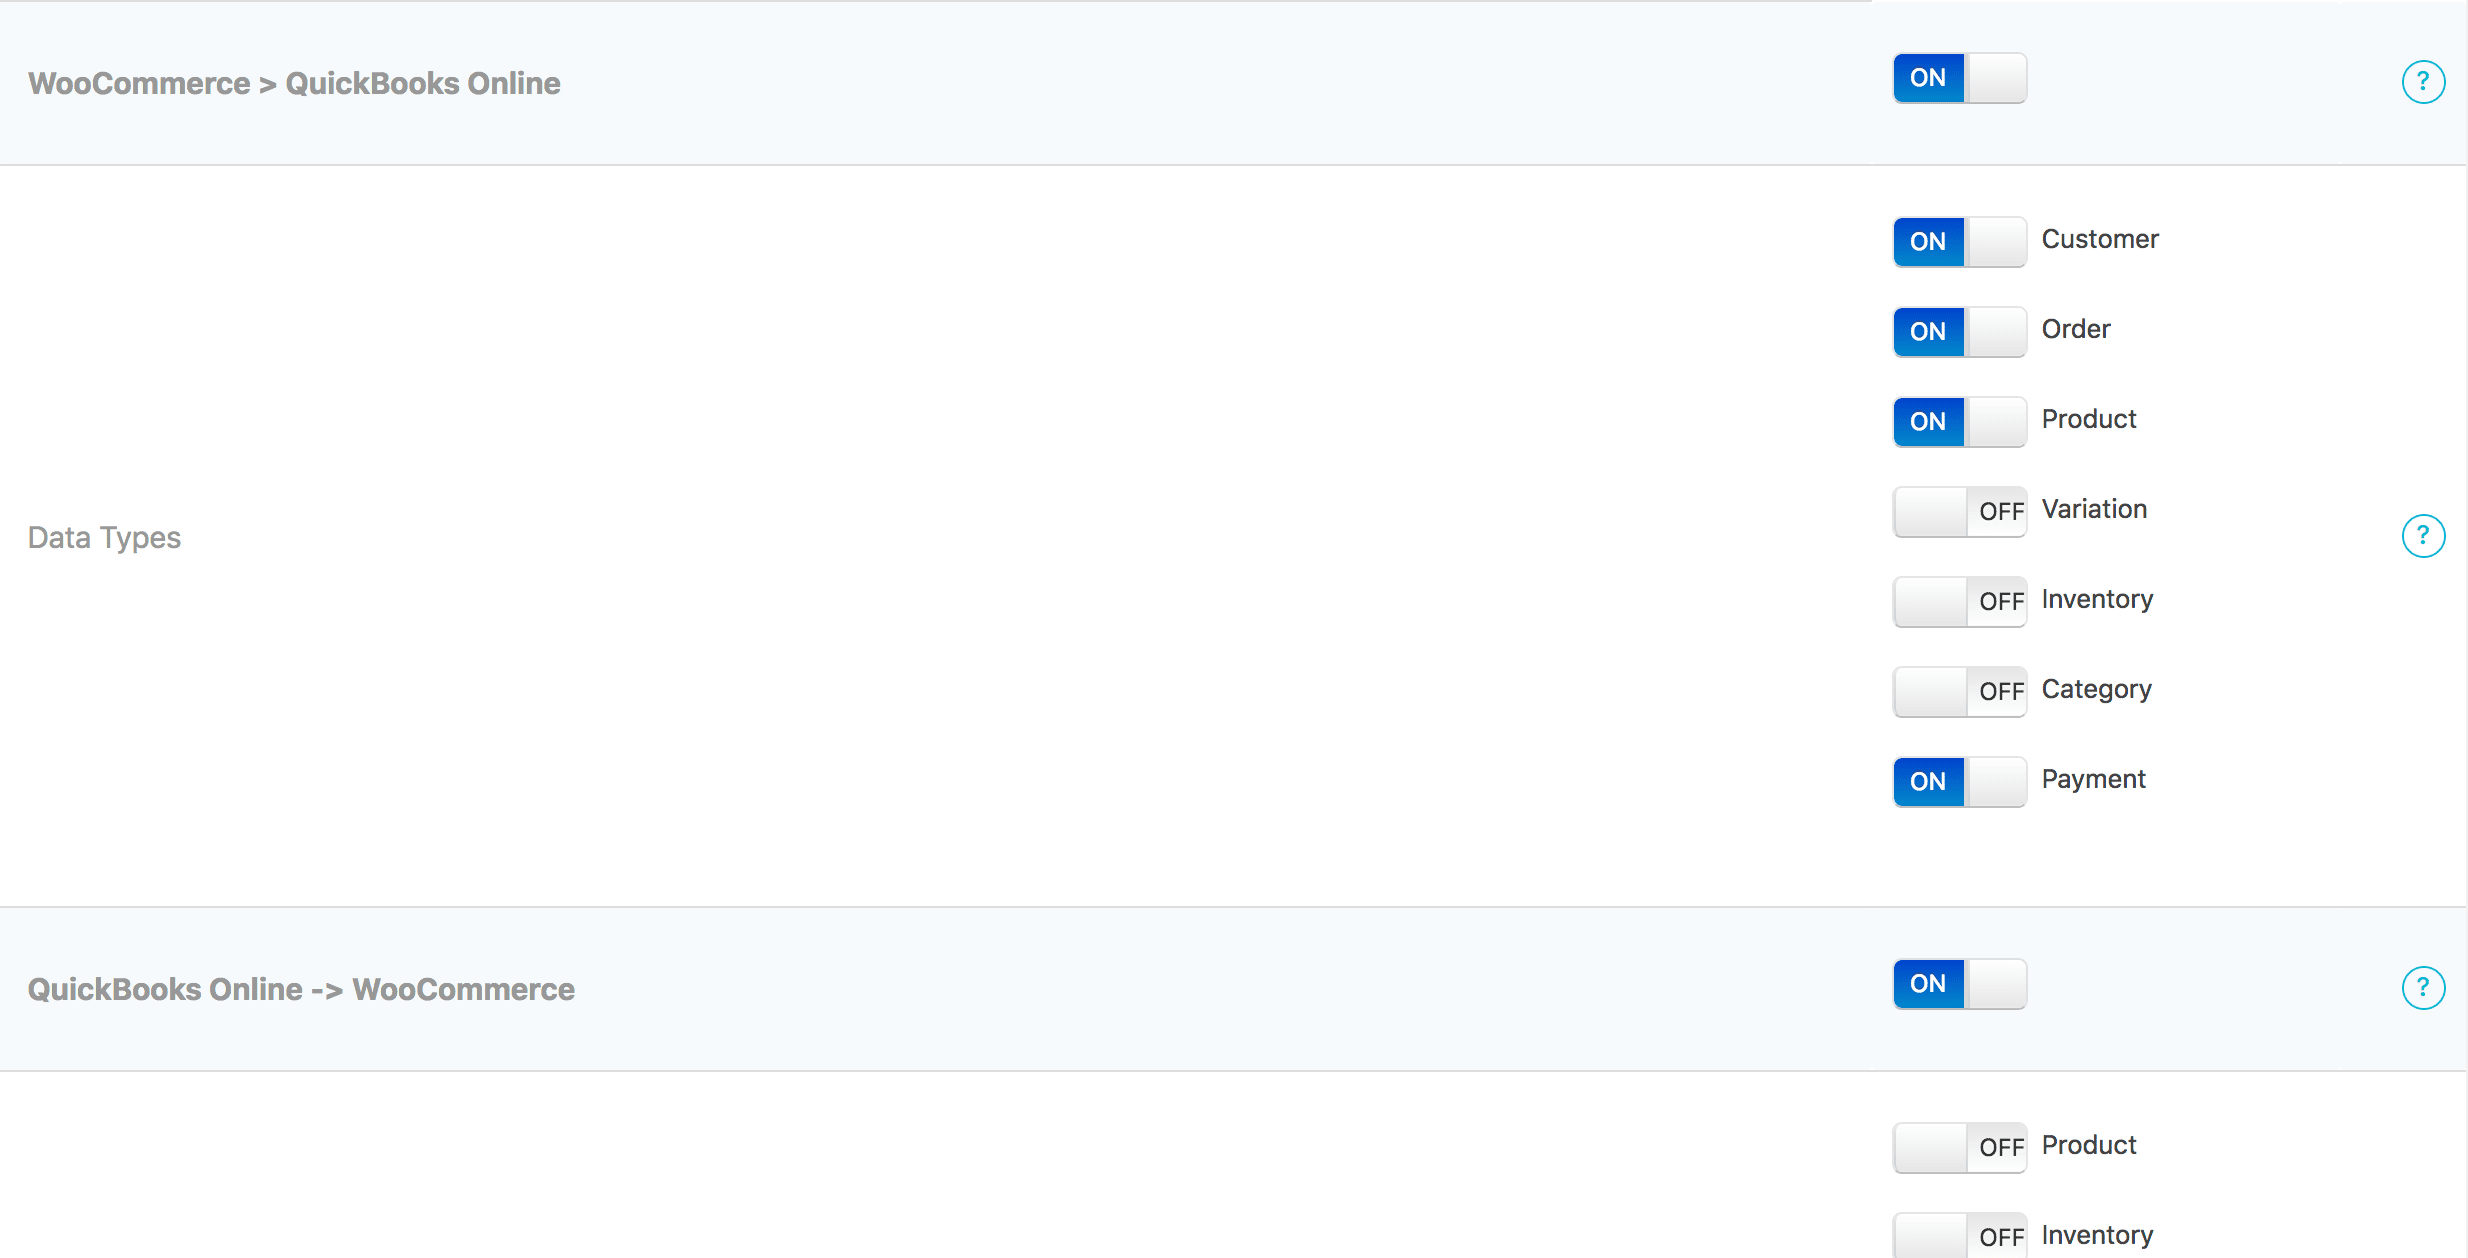
There is no right or wrong setting, it all depends on your store setup. If you manage your inventory in QuickBooks, we recommend enabling inventory sync from QuickBooks to WooCommerce. If you change/update inventory levels in WooCommerce, we recommend enabling the sync from WooCommerce to QuickBooks. We’ll always sync inventory changes made by orders from WooCommerce to QuickBooks, so that’s not something you’ll have to set here. Or, you may also sync both ways.
Next, we can do a one-time inventory pull or push.
Pushing is from WooCommerce to QuickBooks, and pulling us from QuickBooks into WooCommerce.
If your inventory levels are in QuickBooks, you would pull them into WooCommerce. Let me show you!
On this page, you see your QuickBooks products, SKUs, status, price, stock, date created, and sync status. You may easily view at a glance which product inventories are in sync and pull in inventory levels for any products that are not in sync. All you have to do is tick the box on the left of the product and then click pull.
The inventory push feature is quite similar. You can also view the sync status indicator and tick the box next to any products whose inventory levels you would like to sync.
Keep in mind that this is simply a one-time process. Once you have pulled or pushed your inventory levels and put them in sync, any and all changes in inventory will sync based on the automatic sync settings that we set earlier.
If you would prefer not to sync inventory changes automatically, you may keep automatic sync for inventory turned off and then come back to your pull and push pages anytime that you would like to update your inventory levels.
As you can see, our sync settings are flexible and customizable, ensuring that your data syncs exactly the way you’d like it to.
Do you have any questions about syncing data between WooCommerce and QuickBooks?? Feel free to jump on live chat; we’re always glad to help!