With its vast array of features and plug-ins, it’s no wonder WooCommerce is the leading ecommerce platform. You can tailor the order process to their specific needs and preferences.
Many store owners find WooCommerce overwhelming at first. They lose time getting to grips with the features instead of immediately reaping the benefits. The trick is to learn the basics of WooCommerce order management and build on that foundation.
Our article explores all the WooCommerce order features and breaks down how they work. Keep reading to learn how to create a scalable order management process that increases efficiency and reduces errors.
How does WooCommerce order management work?
WooCommerce automatically creates an order when a customer completes the check-out process on your website. The platform can also:
- Process and track orders
- Handle returns and refunds
- Update customers and suppliers
- Prompt you to take action
- Send alerts about issues
You can add plug-ins and integrations to help manage orders. Many store owners connect WooCommerce to their accounting platform from day one with a sync like MyWorks. That’s the most effective way to ensure you record all order, sales, and inventory data in your books.
A look at the WooCommerce order management page
Let’s explore all the WooCommerce order features and where they live inside the dashboard. If you click on ‘Orders’ in the sidebar menu, you’ll see something like this:
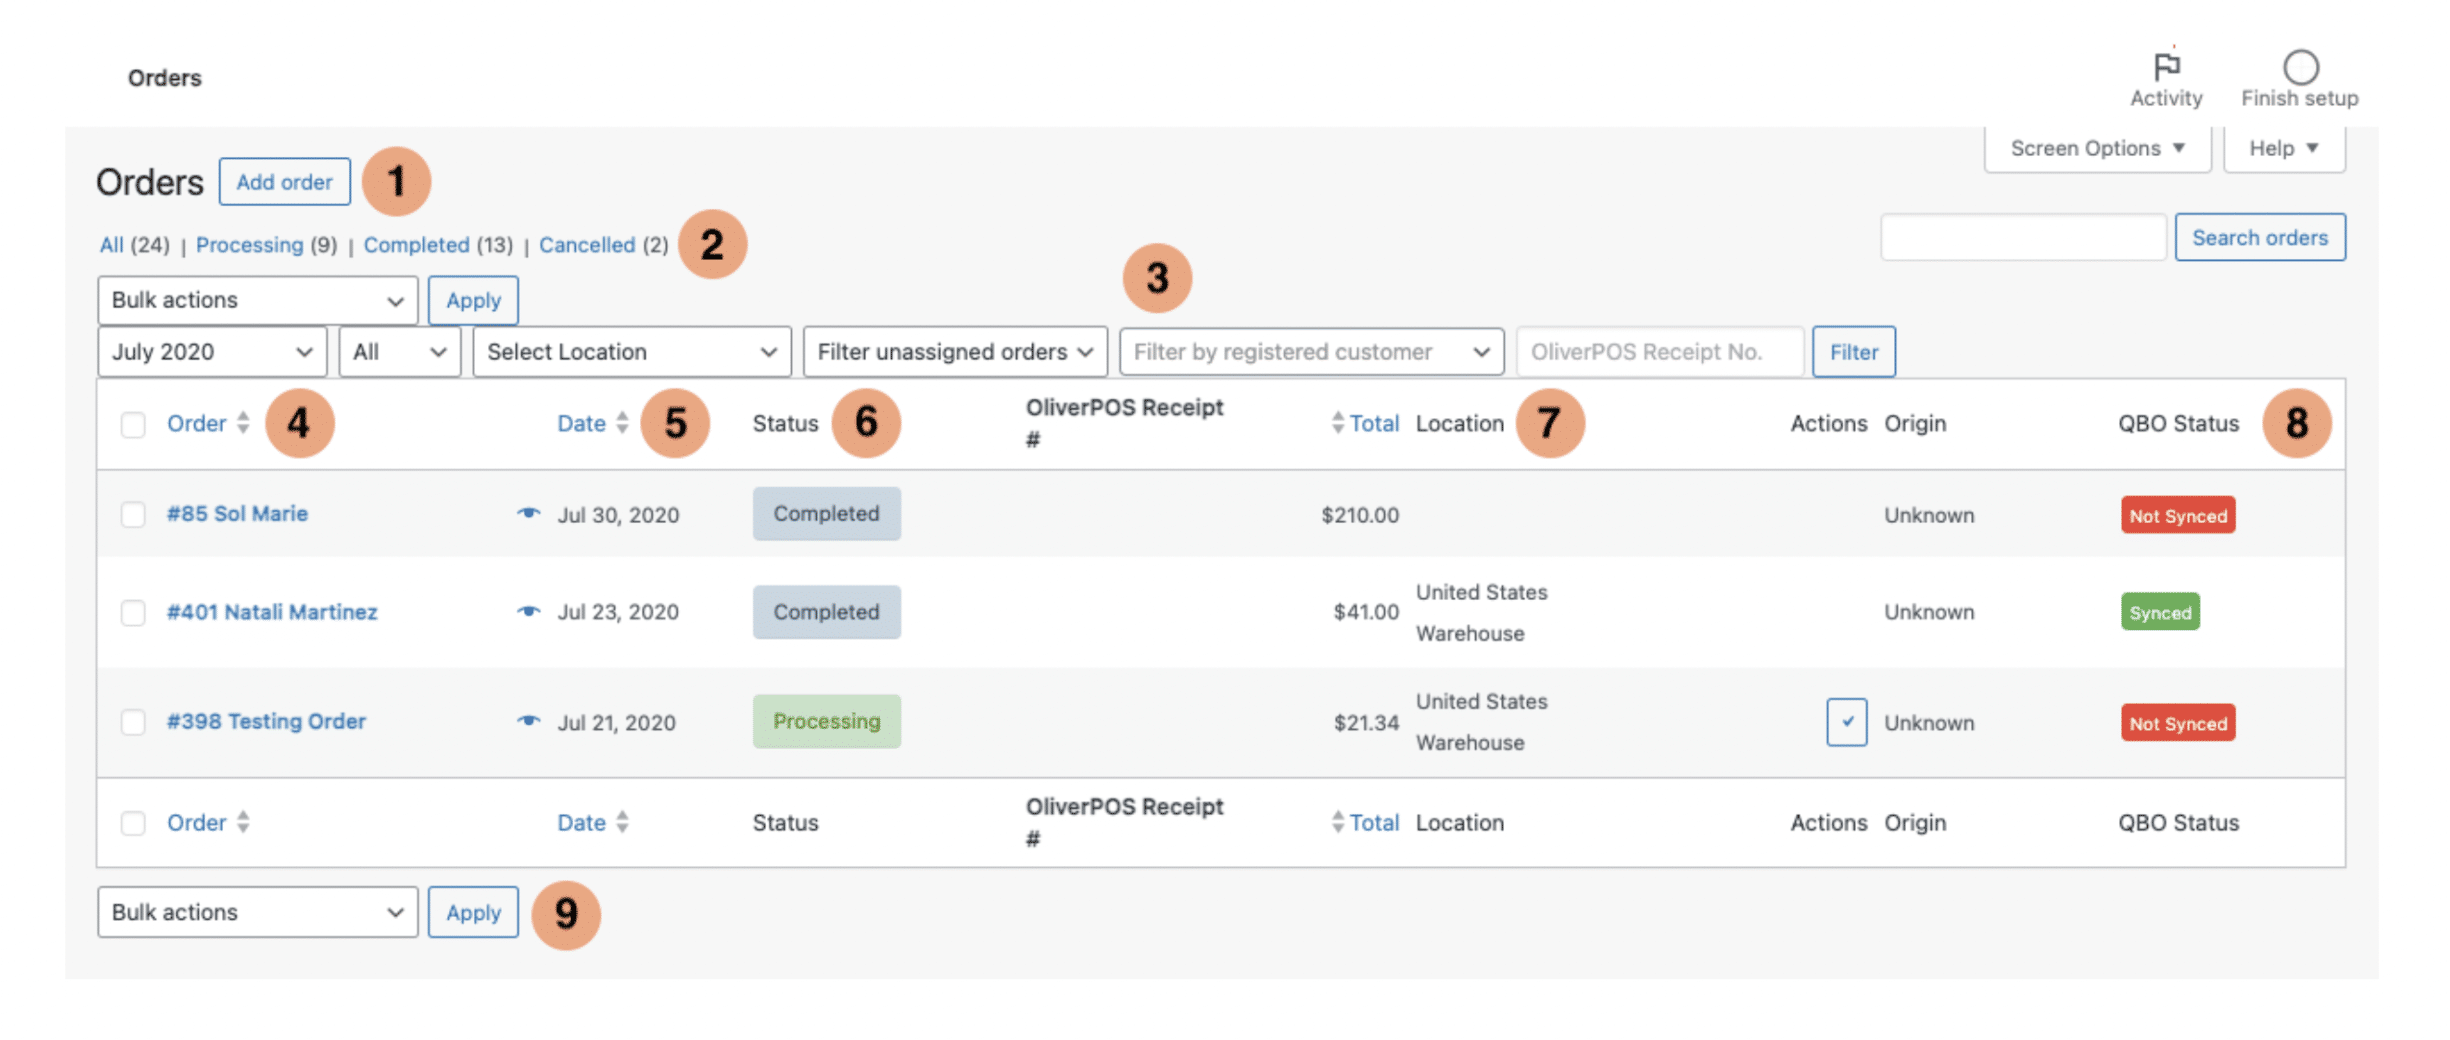
- Add order: A link to a new page where you can create a manual order.
- All/Processing/Completed/Canceled: Shortcuts that let you quickly sort orders by their status.
- Filter by registered customer: A search tool that lets you view a customer’s history by typing in their ID number.
- Order: The unique name or number that identifies an order.
- Date: The day the software accepted the order.
- Status: A notification displaying the order’s current phase based on triggers like payments or shipping confirmation.
- Location: The warehouse you’ll be using to ship the order (if you have more than one).
- QBO/Xero Status: If you’ve installed MyWorks, this notification shows whether you’ve transferred the order data from WooCommerce to your accounting software.
- Bulk actions: A tool that lets you apply status changes to multiple orders.
WooCommerce order statuses
You probably spend a lot of time checking the WooCommerce order status updates. These updates let you monitor the progress of every order and indicate whether you need to take action.
Here’s a breakdown of the order status within WooCommerce:
| Status | Trigger |
| Draft | An order has been manually created within the store admin area. |
| Pending payment | A customer has made an order but you haven’t received their payment yet. |
| Processing | You’ve received the payment and your store can prepare for shipment. |
| On hold | Something has delayed or paused the order but you’ve reserved the product for the customer. |
| Completed | The delivery company confirms the customer has received the order. |
| Failed | The payment method fails or the customer abandons their purchase. |
| Canceled | You or the customer manually stop the order process. |
| Refunded | You have returned the payment to the customer or selected ‘manual refund’. |
Businesses often have different order processes or require extra steps. For example, it’s not uncommon for stores to offer customer pick-ups or perform quality checks.
You can customize your WooCommerce order management process with plug-ins like Addify and SkyVerge. These tools let you easily create your own statuses and assign triggers. That means you can still get notified at critical stages of the process and retain a high level of control.
No need to worry about recording custom WooCommerce order details in your books either. A highly configurable sync like MyWorks lets you map any of these fields into your accounting software.
How to create a manual order in WooCommerce
While WooCommerce handles a lot of the order process, sometimes you might need to enter an order manually. For example, you might need to honor a one-off special request or process a sale you made offline.
Here’s how to do it in five steps:
Step 1. Open the new order form
Open WooCommerce and go to the ‘Order’ tab in the sidebar menu. Click ‘Add order’ to open a new page.
Step 2. Add the customer and billing details
Enter the customer and billing details in all the mandatory fields. WooCommerce automatically generates the ID number.
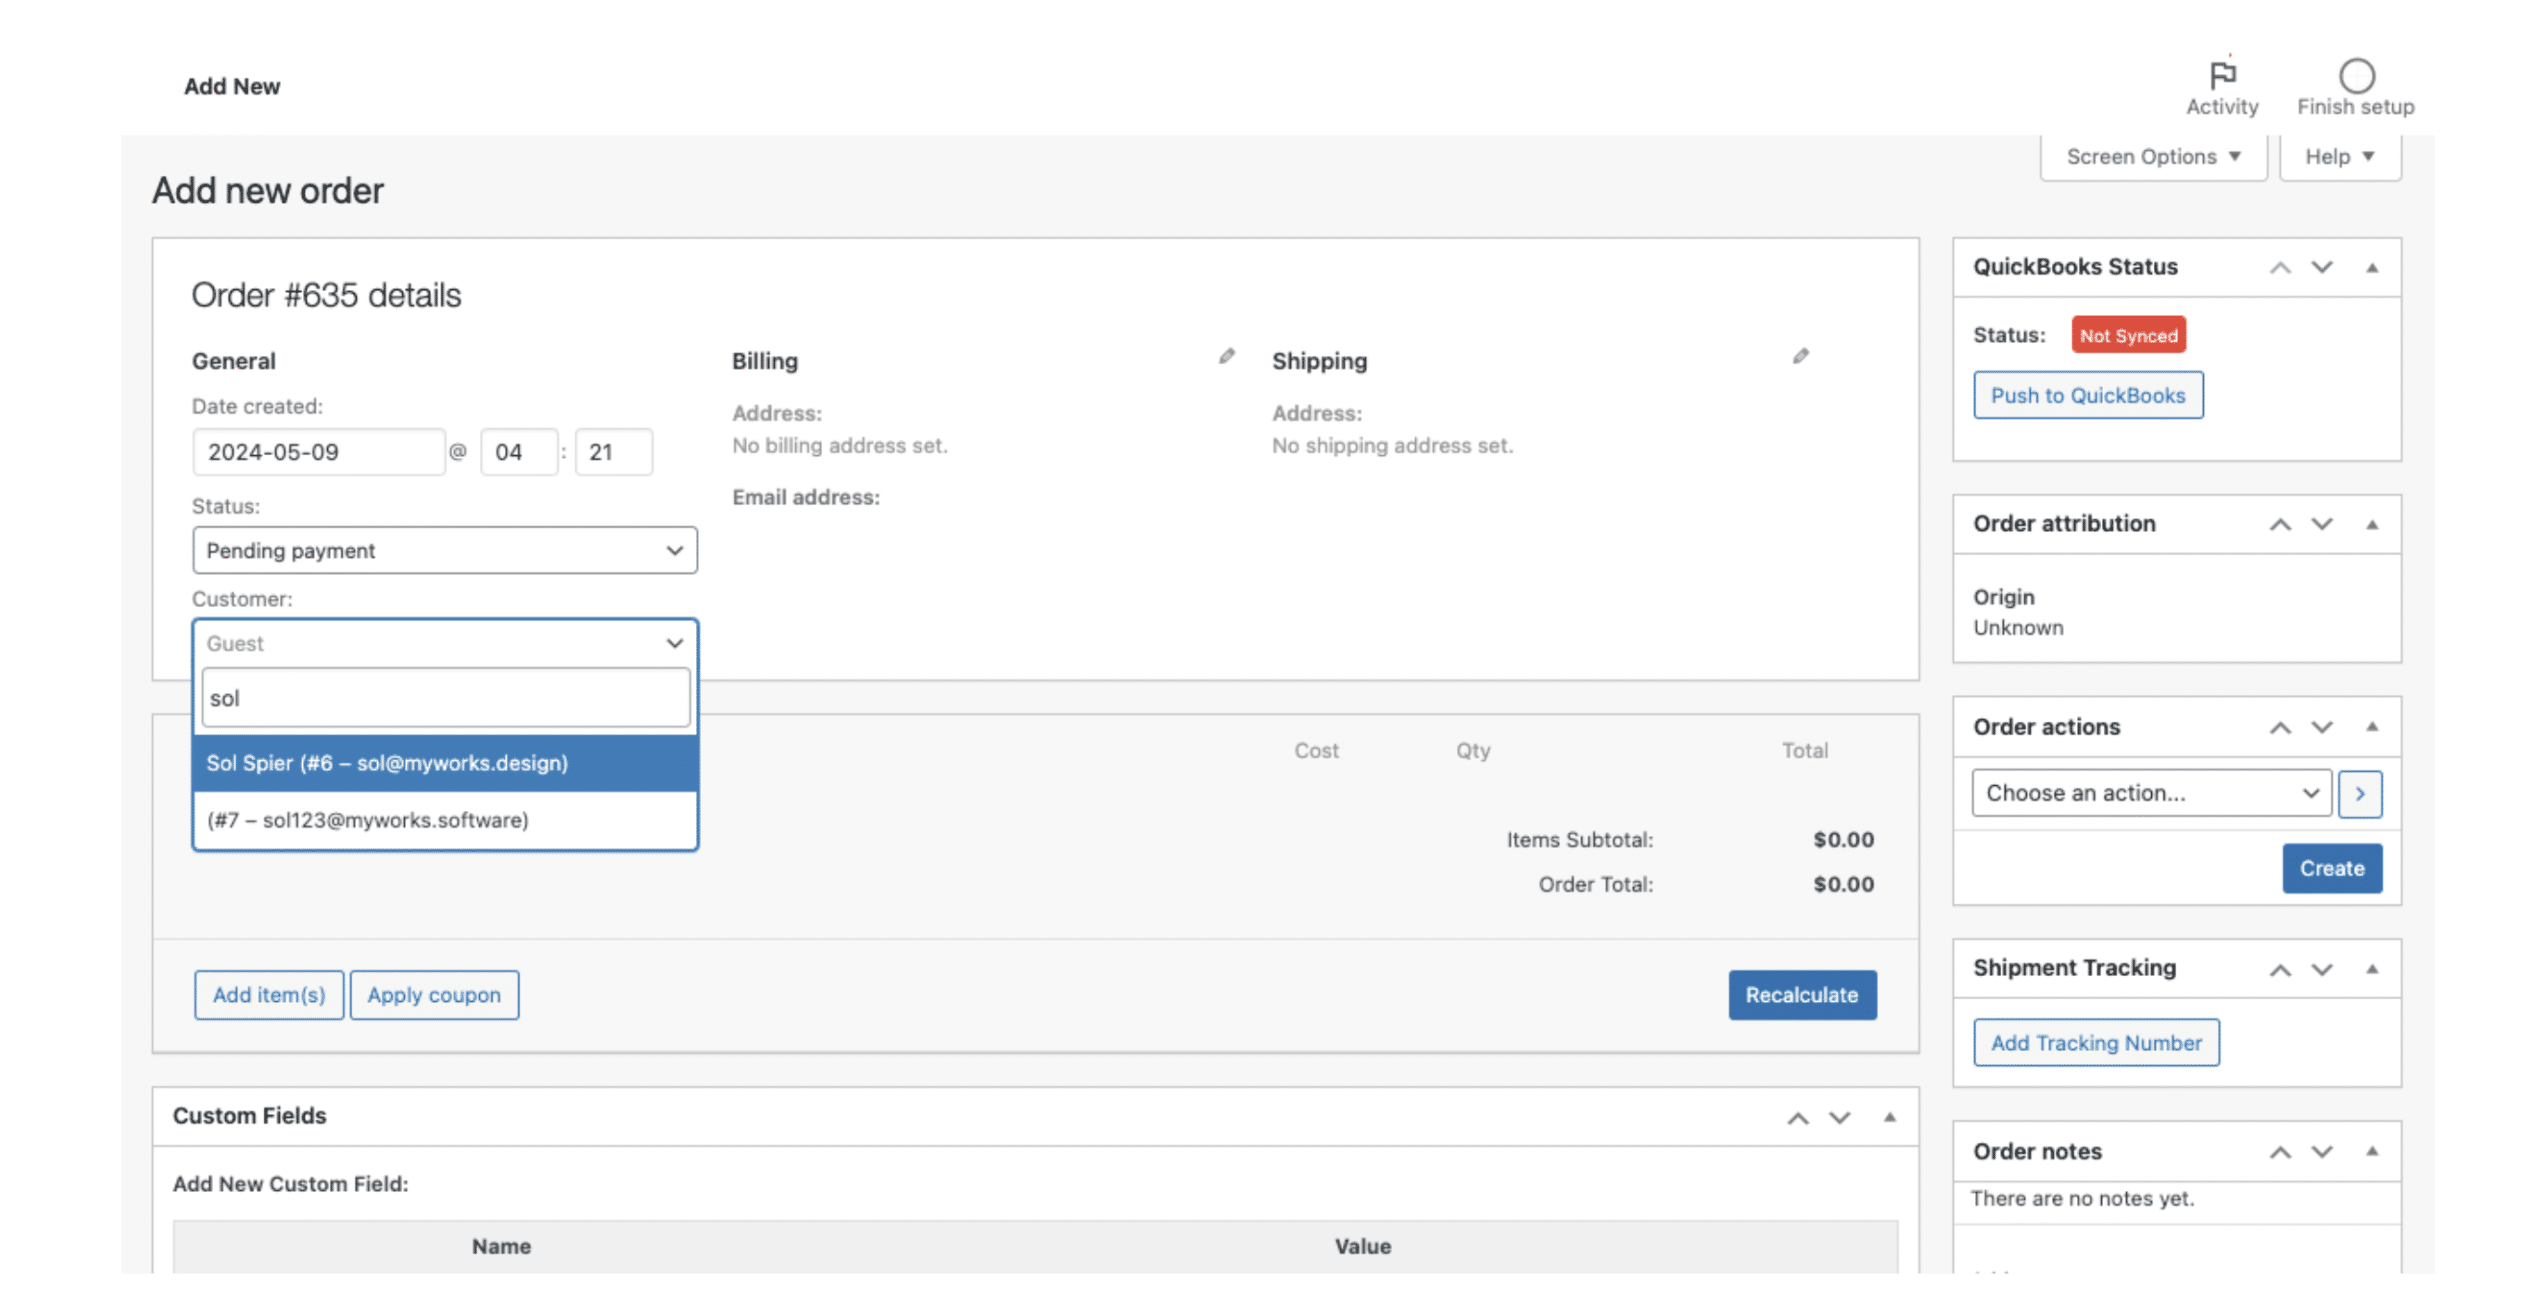
If you’re creating an order for a registered customer, type their name and select them from the dropdown menu. WooCommerce can complete the form with their saved data.
Step 3. Select products or services
Scroll down the dashboard to reveal the item form. Select the product the customer wants to order and click ‘Add’. WooCommerce calculates a total but you’ll have to add the fees, shipping, and tax.
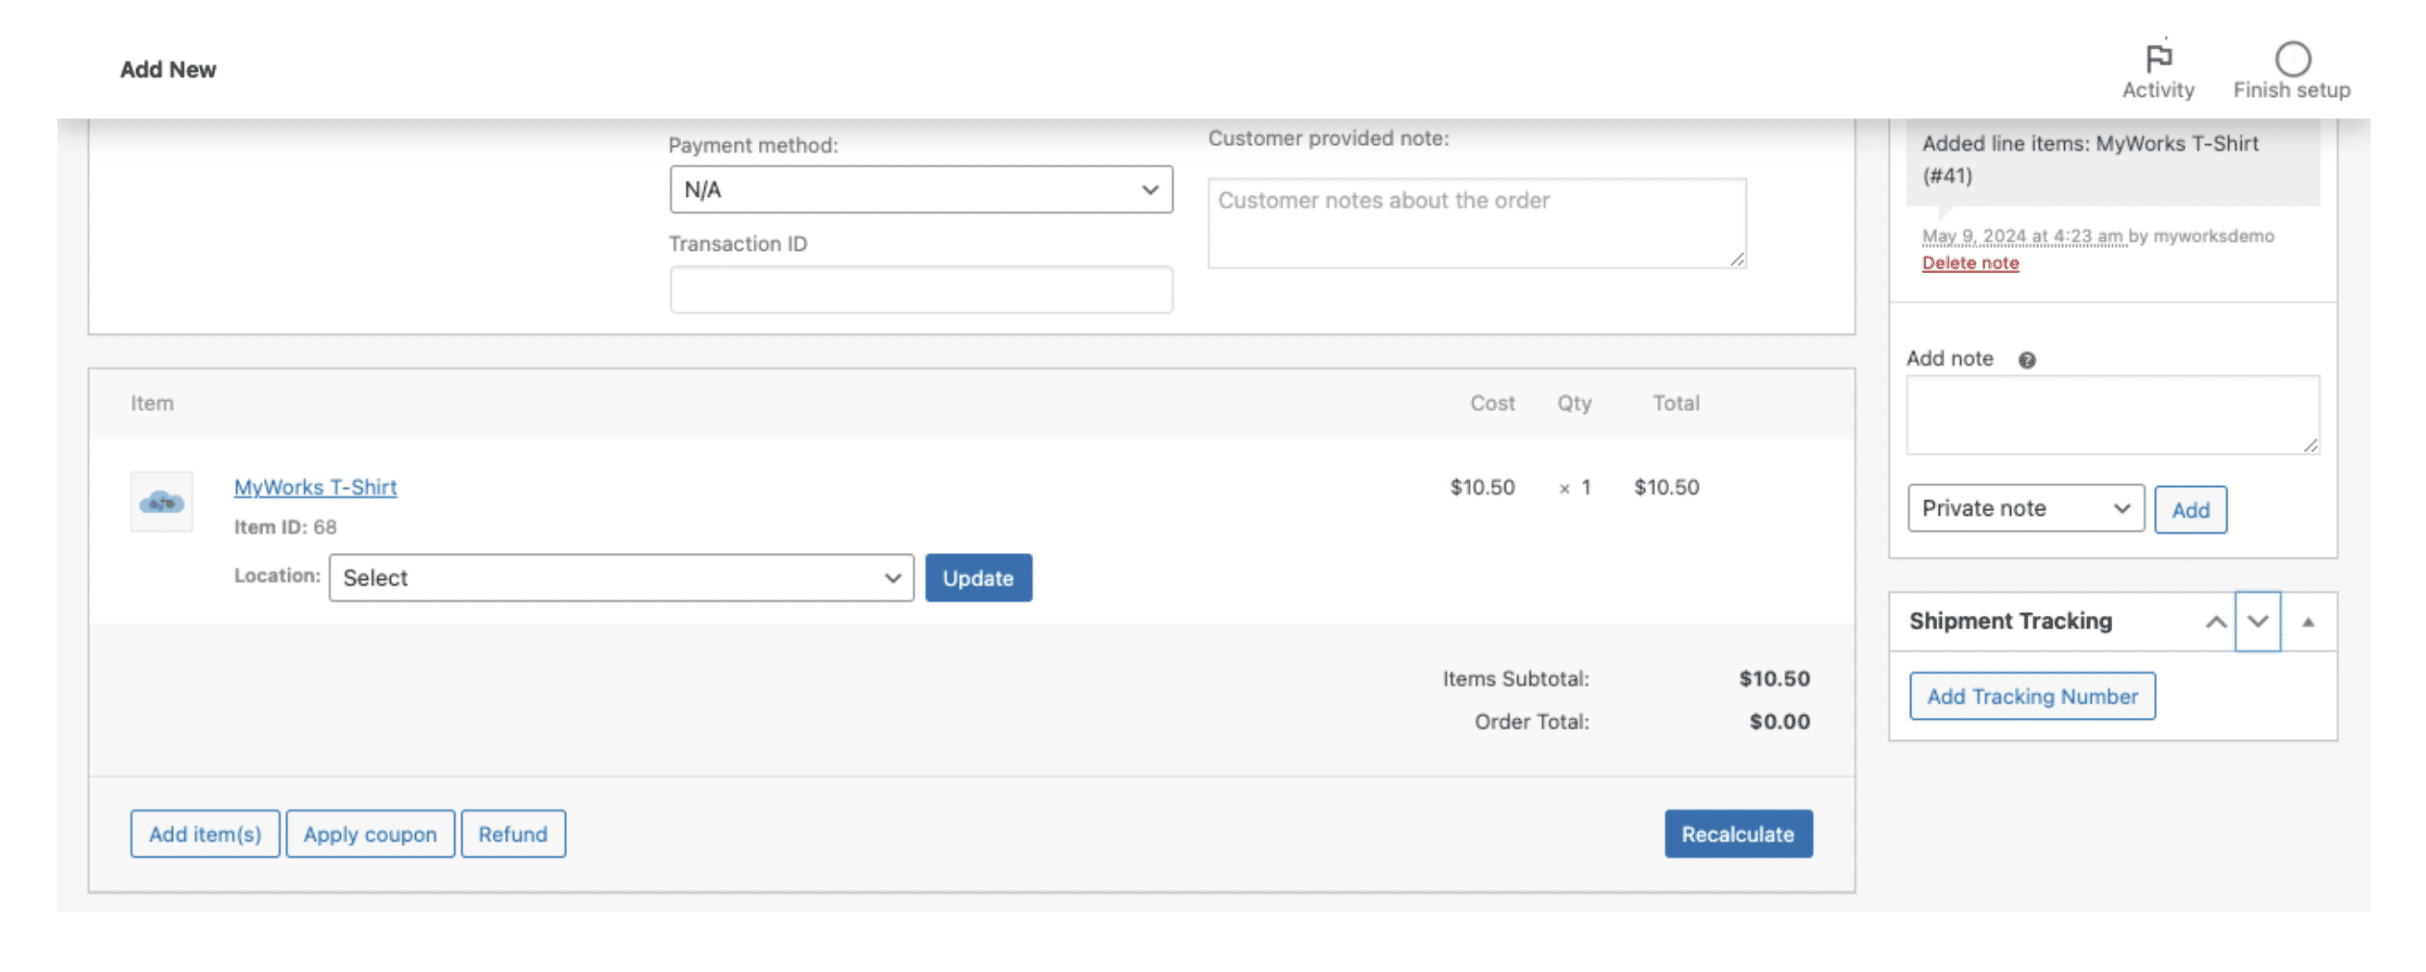
You can add custom attributes to the order like ‘high priority’ or ‘express delivery’ using the form below the item one.
Step 4. Generate the order
Scroll back to the top of the dashboard. The default order status is ‘Payment pending’ so change that if it’s not the case. Then click ‘Create’ in the top right corner to start the order process.
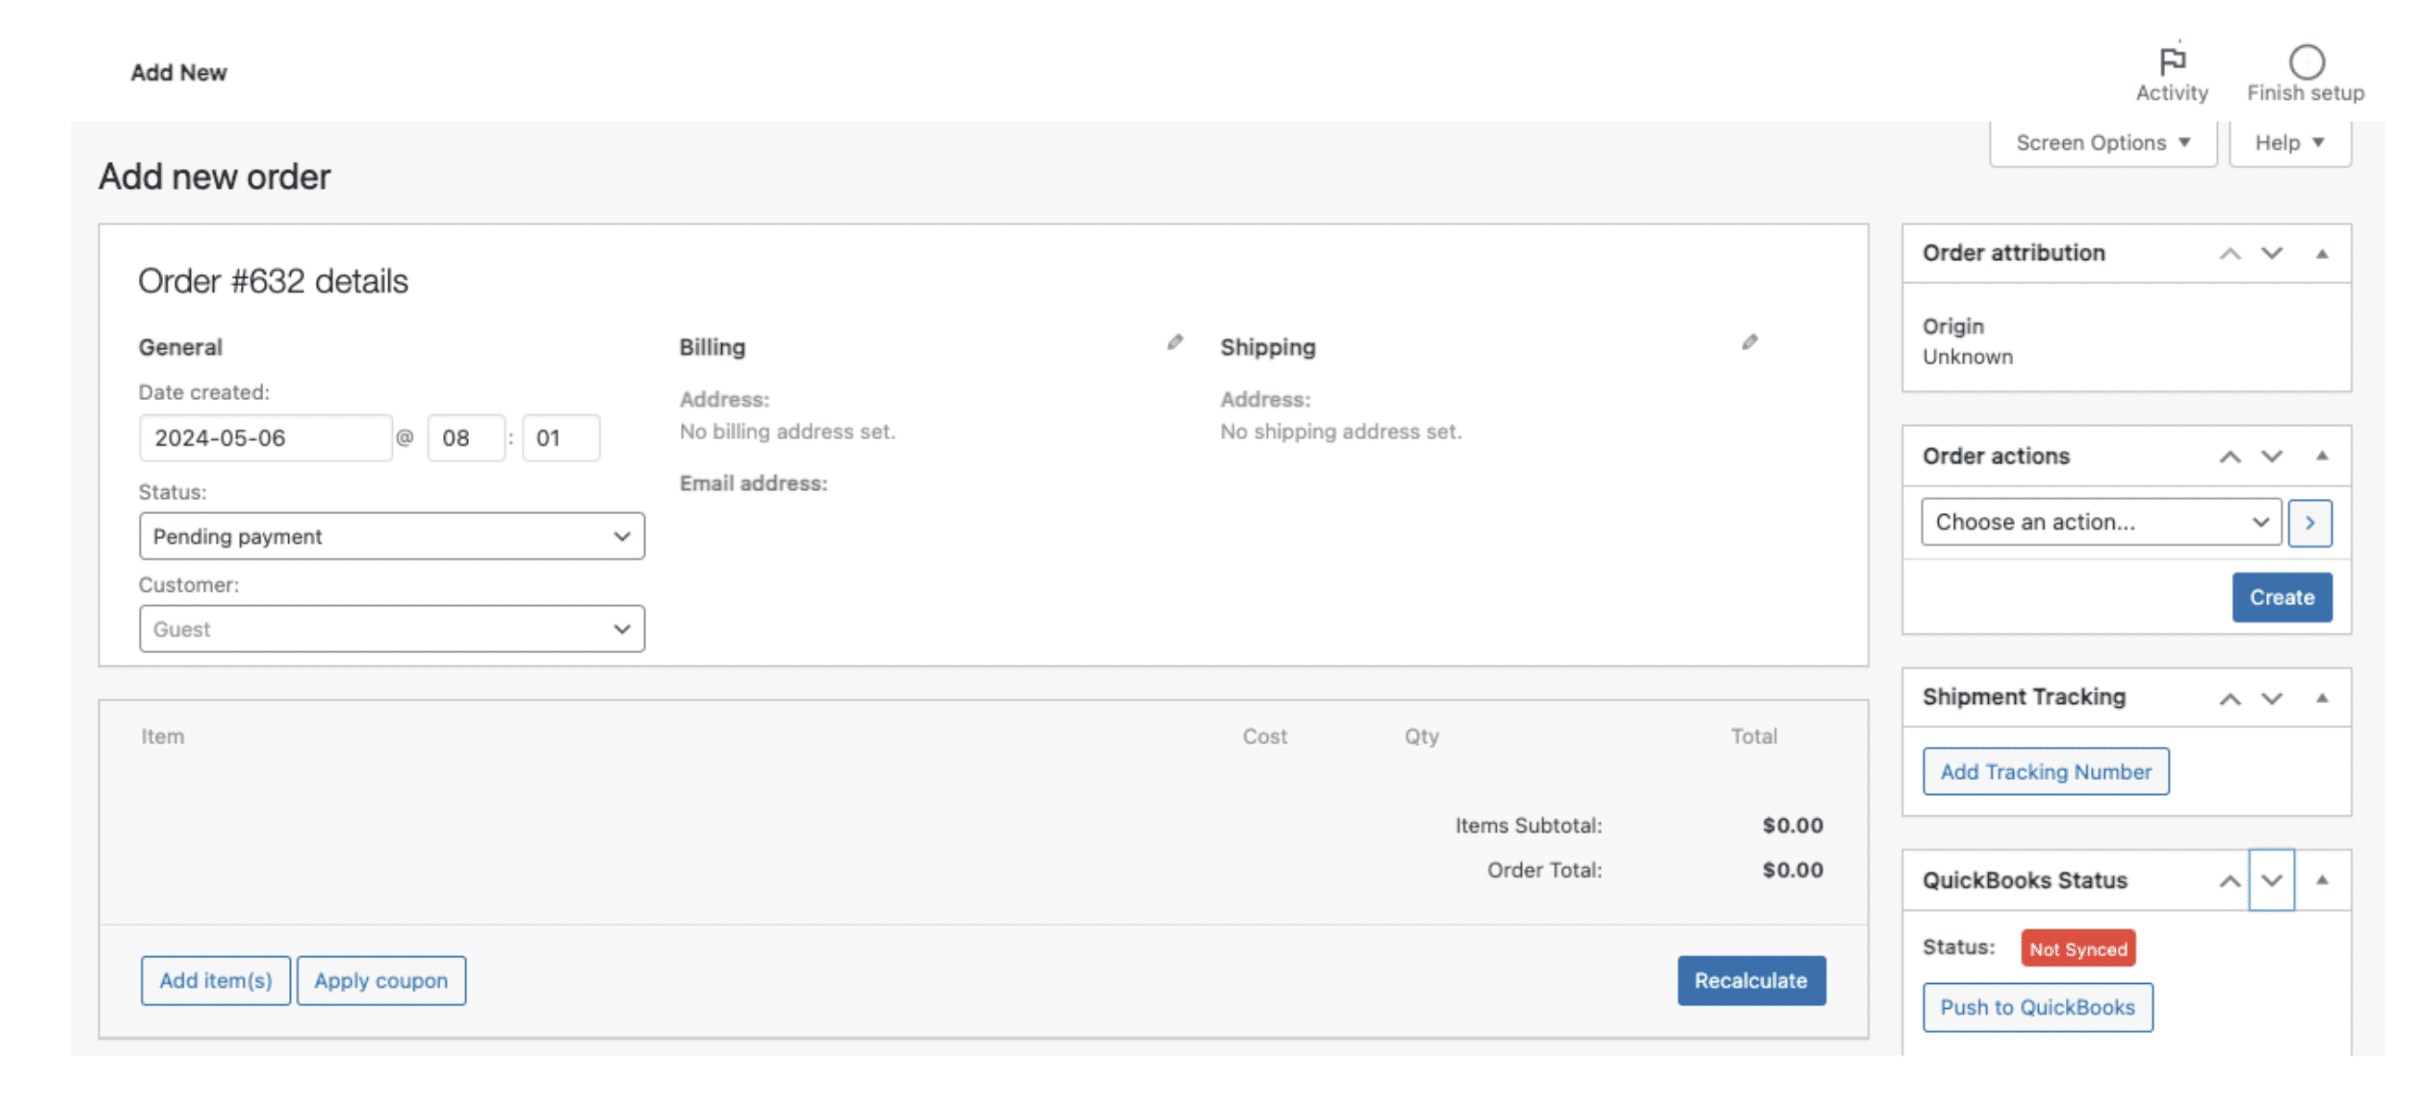
The order should appear at the top of the main Orders dashboard in WooCommerce.
Step 5. Sync the order data
If you’ve installed an automatic sync like MyWorks, the software will transfer the order data to your accounting platform.
Fixing failed orders in WooCommerce
Sometimes orders fail and you have to handle them yourself. However, WooCommerce gives you a helping hand by identifying the issue and sending you a notification. The order status also changes to ‘failed’.
Your first step is clicking on the order in the WooCommerce dashboard. The notes should explain what caused the failure.
Payment errors are a common cause of failed orders. You can ask the customer to try again and manually change the status to ‘pending’ if they agree. If the problem persists, you can offer to put the item on hold.
Other times, you may find you need to update some software or check your credentials. Fix these issues before restarting the order.
As much as you try to avoid them, failed orders are inevitable. That’s why it’s best to have an advanced notification plug-in to spot issues and update customers more quickly. You can create custom templates to apologize to customers in your own words when things go wrong.
Manage orders effortlessly with the right tool kit
WooCommerce’s features may seem daunting at first. Understanding the core functions and choosing the right tools can set your store up for success.
No matter your type of business, you’ll always need to connect your WooCommerce store with your accounting software. That’s where an ecommerce accounting sync like MyWorks comes in. We let you seamlessly share all data between the platforms and manage the integration from your WooCommerce dashboard.
| Looking to optimize your WooCommerce order management?
Seamlessly connect your ecommerce and accounting platforms with MyWorks. |


