




Using MyWorks Sync is the easiest way to manage Shopify sales in QuickBooks Desktop, with automated syncing, accurate order mapping, and efficient ecommerce accounting. Recording Shopify sales in QuickBooks Desktop means automatically syncing each order (customers, line items, taxes, and fees) into your company file, so your books match your store without manual entry.
This step-by-step guide explains how to record Shopify orders in QuickBooks Desktop using MyWorks and answers common questions about integration, product mapping, and transaction fee tracking.
Whether you need to automate sales data transfer, minimize manual entry errors, or simplify your bookkeeping workflow, you’ll learn how to optimize Shopify and QuickBooks Desktop connections for accurate ecommerce financial management.
TL;DR: 6 Steps to Record Shopify Sales in QuickBooks Desktop
- Install the app: add the MyWorks QuickBooks Desktop app from the Shopify App Store.
- Connect: download the Connection File and run it through the QuickBooks Web Connector.
- Map: match your Shopify products and payment methods to QuickBooks.
- Set your sync: choose what syncs (orders, fees, inventory) and how often.
- Handle fees: add Shopify transaction fees as a line item.
- Test: push one order through and confirm it works correctly.
Using QuickBooks Online instead? See our QuickBooks Online guide.
Choosing the Right Shopify QuickBooks Desktop Integration
The first step is finding a Shopify app that syncs with QuickBooks Desktop and lets you easily record sales. These are the key considerations:
- Support for Desktop: it’s crucial to choose a sync dedicated to QuickBooks Desktop, as Intuit has discontinued some versions.
- Deep integration: the ideal platform can be managed from within the Shopify dashboard, so you don’t have to keep switching windows.
- Customizable features: look for flexible sync and mapping features that let you tailor the settings to your processes.
- Real-time sync: your chosen software should continuously monitor your store for changes and automatically transfer data between Shopify and QuickBooks Desktop.
- User-friendly interface: your staff is more likely to learn and use intuitive software that fits their workflow.
- Simple setup: you should be able to set up an ecommerce accounting sync quickly using the company’s guides and tutorials.
- Responsive customer support: immediate access to expert guidance can help you resolve any issues quickly.
- Affordable plans: the starter plans should make sense for small businesses and deliver good value for money across the tiers.
Since every business has unique requirements, we suggest identifying a Shopify and QuickBooks Desktop integration that matches your specific needs and preferences. MyWorks supports all the considerations listed above, and we are dedicated to supporting QuickBooks Desktop.
How to Record Shopify Sales in QuickBooks Desktop with MyWorks
The fastest way to record Shopify sales in QuickBooks Desktop is a dedicated sync like MyWorks. It connects via the QuickBooks Web Connector and automatically posts every order to your company file. The full setup takes about an hour:
Step 1: Install the MyWorks App
Search for the MyWorks QuickBooks Desktop Sync app in the Shopify app store. Make sure you choose the correct version, as we also support QuickBooks Online. Once you’ve found the right one, click ‘install.’
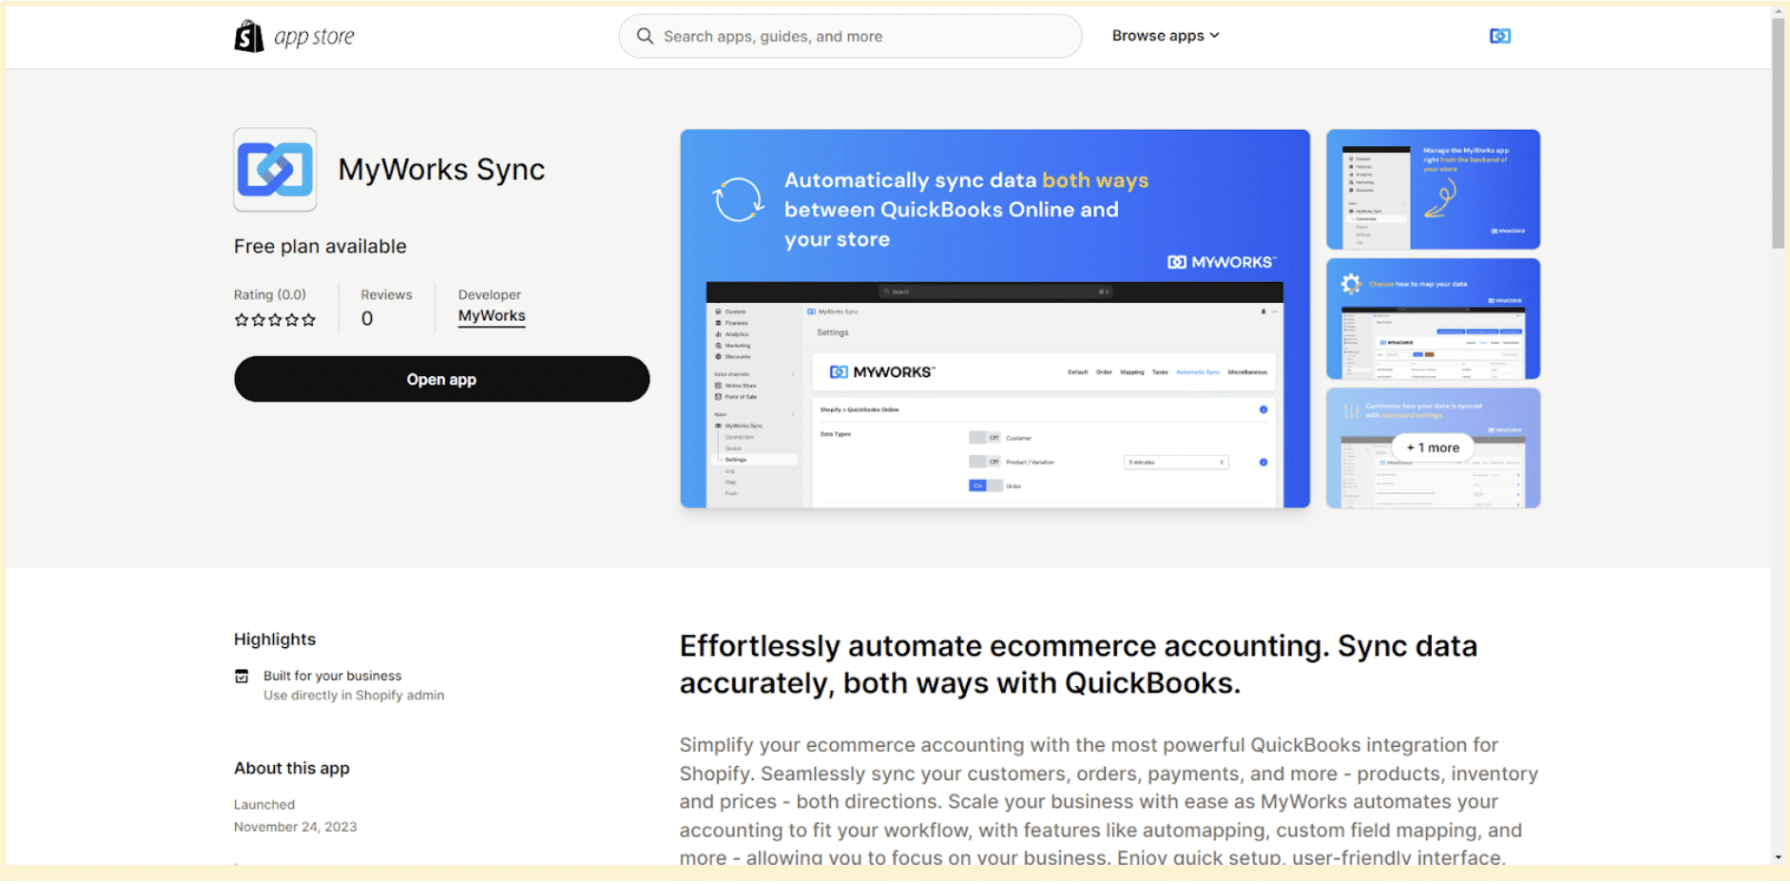
The MyWorks QBD app should appear on your Shopify dashboard. Open it and select ‘Connection’ from the drop-down menu.
Step 2: Connect Shopify to QuickBooks Desktop
1. Click the green ‘Download QuickBooks Connection File’ button inside the MyWorks app.
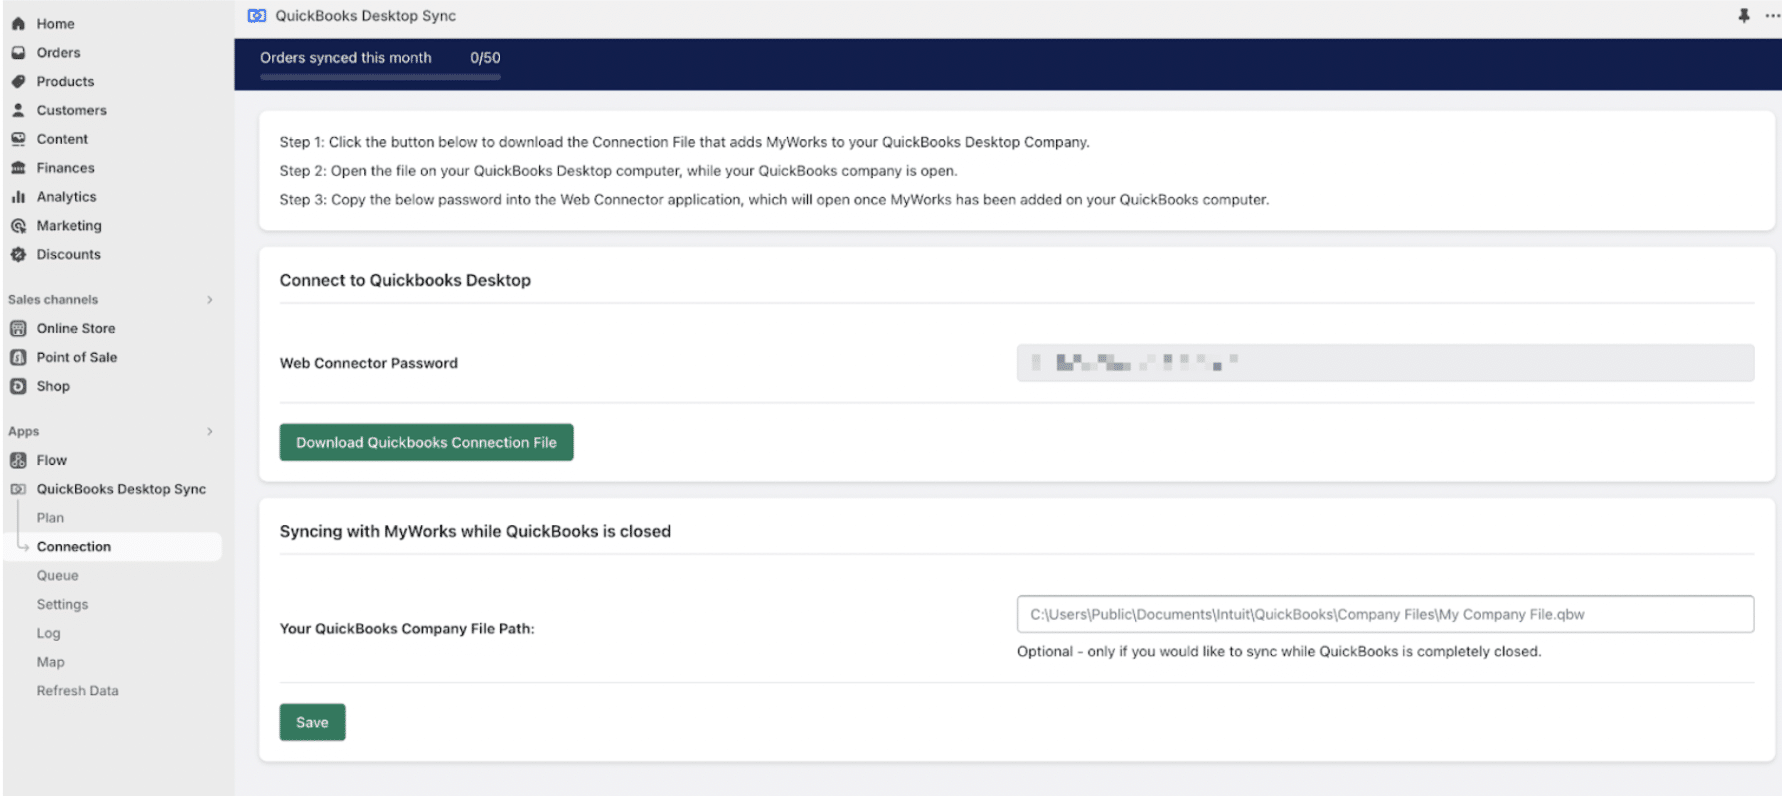
2. Open that file on the computer where your QuickBooks Desktop company file lives, with the company open and yourself logged in as an admin. Opening it adds MyWorks to the QuickBooks Web Connector on that computer.
3. Copy the Web Connector Password from MyWorks Sync in your Shopify store into the password field, then confirm the two pop-ups that appear.
4. Choose ‘Yes, whenever this QuickBooks company is open’ so the sync can run without supervision, and click ‘Update Selected’ to run it for the first time.
Step 3: Map Your Product Data Across Shopify and QuickBooks Desktop
Now you’re ready to map all your products across Shopify and QuickBooks Desktop. With MyWorks, you can either do this manually or authorize the software to do it automatically.
Unfamiliar with the term ‘mapping’? It’s a software term for matching two existing pieces of data residing on different platforms so that information can flow between them. In MyWorks, you can map your Shopify products to your QuickBooks products by ID, name, or SKU (stock-keeping unit).
To perform this action, go to the MyWorks app and select the Map menu. Here, you can map your Shopify products and variations to their corresponding products in QuickBooks. You’ll also be able to map your Shopify payment methods to the QuickBooks bank account you’d like them to sync with.
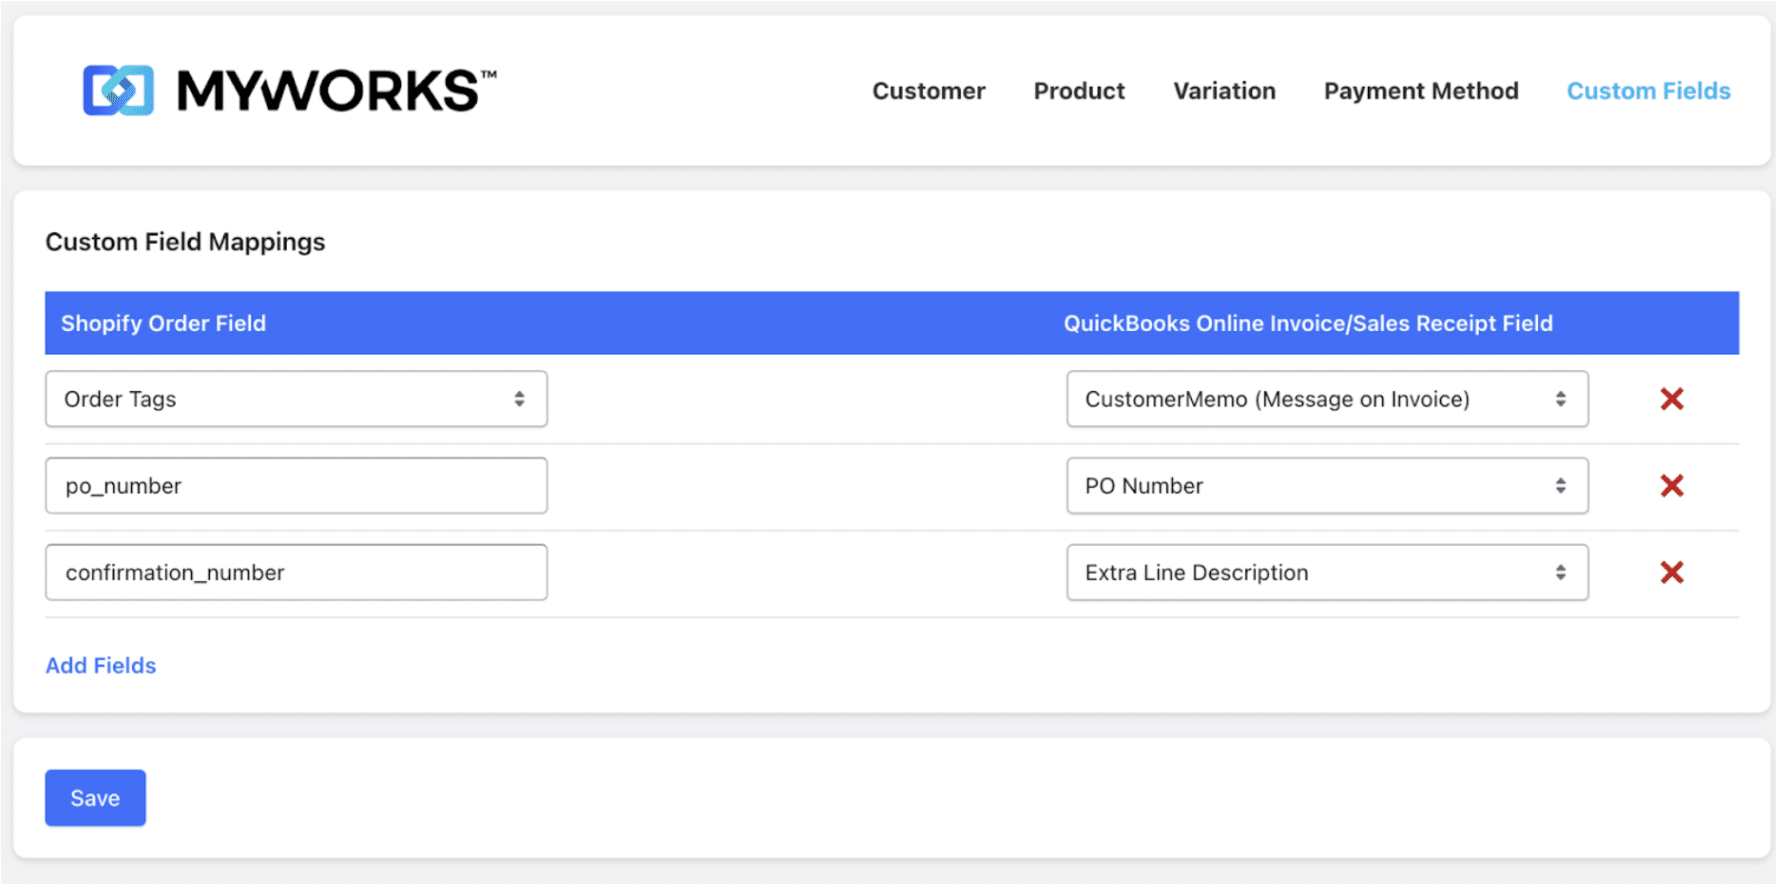
Additionally, MyWorks can support mapping custom fields from Shopify orders to text fields in QuickBooks orders. This can be managed in the ‘Custom Fields’ menu in the ‘Map’ tab.
If you have just downloaded QuickBooks Desktop and don’t have any products in QuickBooks yet, instead of mapping products, you can go to the ‘Push’ tab. This area lets you sync your Shopify products into your QuickBooks Desktop company as new products.
Step 4: Review Your Sync Settings
After you’ve matched everything in Shopify and QuickBooks Desktop, configure your settings to inform MyWorks what data to sync and how.
MyWorks lets you choose how to sync the following types of data:
- Customer and order data
- Products and variations
- Inventory levels and sites
- Pricing and discounts
- Refunds and exchanges
- Transaction fees
- Gift cards
What you decide really depends on how you want to run your business. For example, saving Shopify sales as receipts in QuickBooks is best for immediate payments. However, if you sell a service for which you collect payments later, invoices are better.
MyWorks also lets you choose how often you sync data. You can do it manually or schedule it to run at regular intervals, such as every 5 minutes, depending on your chosen MyWorks plan.
Step 5: Set Up MyWorks to Record Shopify Transaction Fees in QBD
Setting up MyWorks to record Shopify transaction fees in QuickBooks Desktop gives you a more accurate view of your revenue. By logging these charges, you can see exactly how much each sale actually generates.
Stay inside the ‘Map’ tab in the MyWorks dashboard and go to ‘Payment Method’. There, you can choose a QuickBooks item to be used as the line item in QuickBooks orders to record transaction fees.
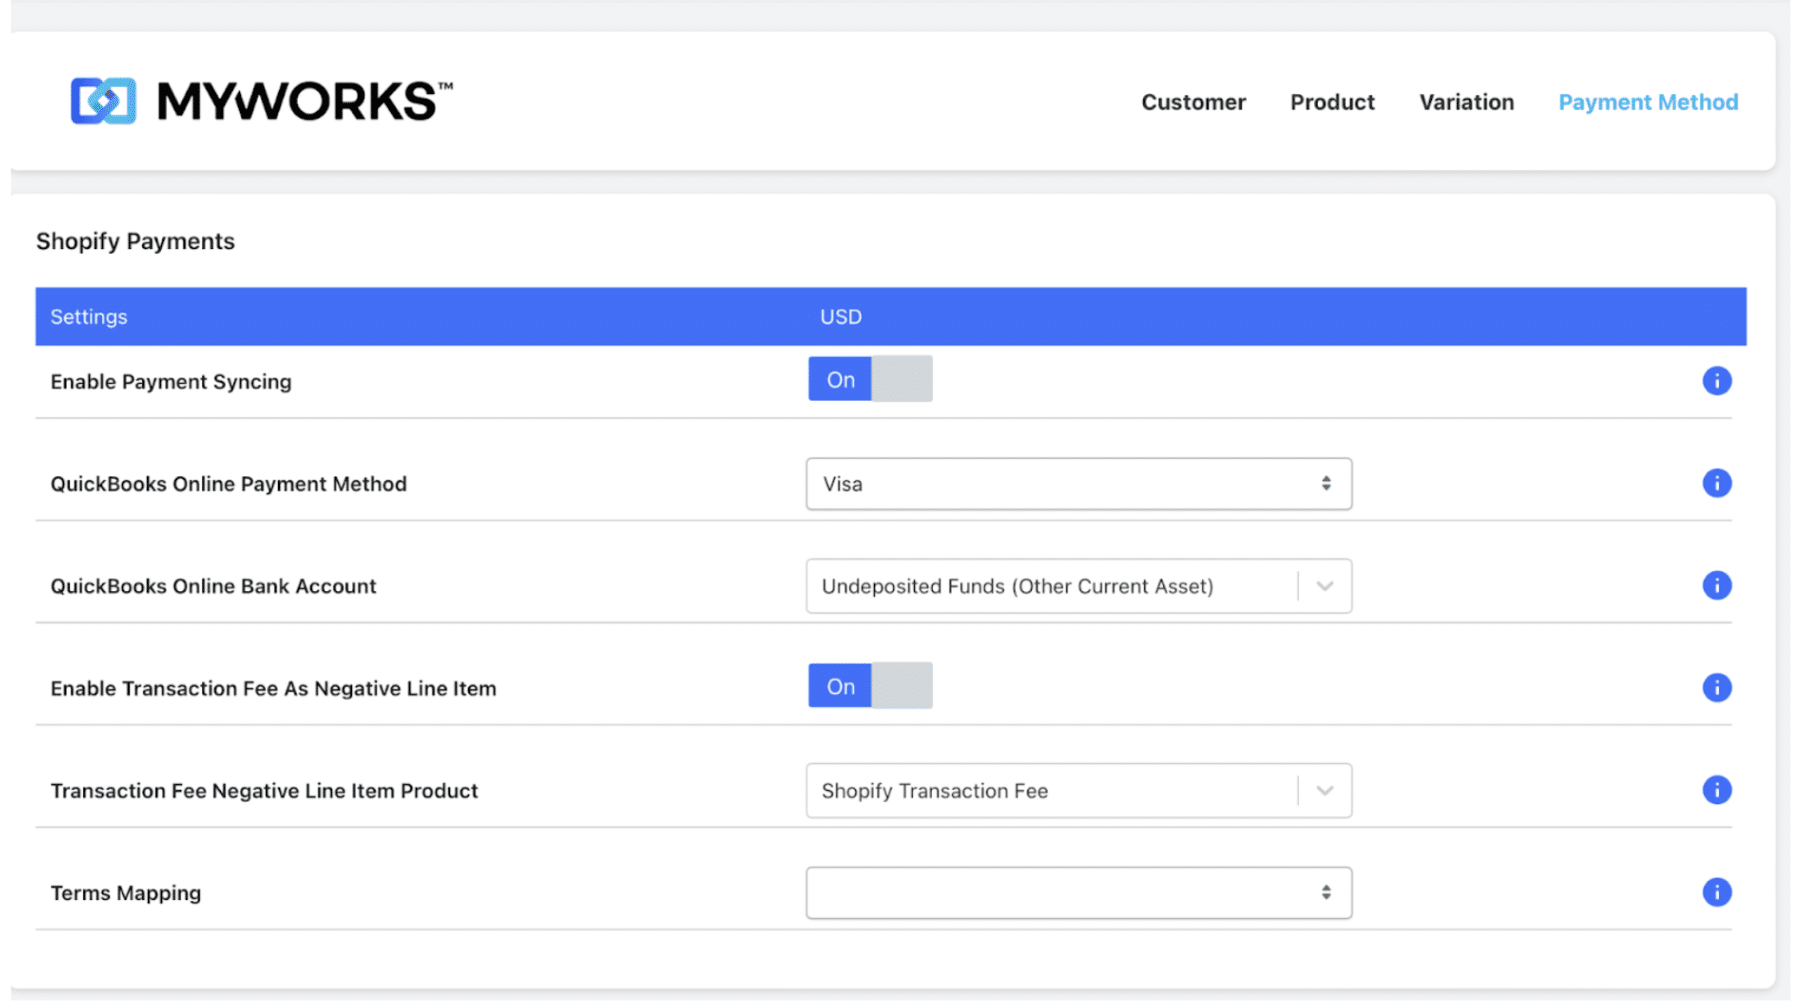
Then enable MyWorks to sync transaction fees in the settings. You should see the charge appear as a line item the next time you sync an order.
Step 6: Review Your Sync Regularly
It’s best to check that your sync works as expected before you start tracking orders. We recommend creating a test product or order in Shopify to see how it appears in QuickBooks Desktop. If it’s not created in QuickBooks exactly the way you’d like, you know you need to tweak the settings again.
Continue to monitor orders over the first few weeks and see whether your current setup suits your workflow. You may find you need to make adjustments. For example, you might have been relying on the pre-set MyWorks fields, but discover you need a new category specific to your industry.
As time goes by, your business is bound to grow and become more complex. Schedule regular reviews to determine whether it’s time to upgrade your MyWorks plan to access more features.
Easily Record Shopify Sales in QuickBooks Desktop with MyWorks
Nobody ever started a business so they could spend all day poring over the books. That’s why many Shopify store owners turn to accounting automation tools like MyWorks to simplify their operations, ensuring every sale is recorded in QuickBooks Desktop without the data errors that come with manual entry.
MyWorks doesn’t replace your accountant or file your taxes. It keeps Shopify and QuickBooks Desktop in agreement, so the numbers your accountant sees are the numbers that actually happened. It’s a Built for Shopify app and an Intuit Platinum Partner, with a free plan to start and a free setup call if you want a hand getting connected.
| Free up time to focus on the big picture.
Start with MyWorks for QuickBooks Desktop and let every sale record itself. |
Common Questions About Syncing Shopify Sales with QBD
1. How Can You Automatically Sync Shopify Sales with QuickBooks Desktop?
You can automatically sync Shopify sales with QBD using dedicated integration tools like MyWorks to connect Shopify and QuickBooks Desktop, enabling real-time, automated transfer of order, product, and fee data.
2. What are the Benefits of Syncing Shopify With QuickBooks Desktop?
The benefits of syncing Shopify with QuickBooks Desktop with MyWorks are improved efficiency, fewer manual errors, simplified ecommerce accounting, and real-time financial visibility.
3. How do You Map Products and Payment Methods between Shopify and QuickBooks?
Authorize product, SKU, and payment data mapping in your integration software, such as MyWorks, for a seamless link between platforms.